Since we launched Amazon Nova customization in Amazon SageMaker AI at AWS NY Summit 2025, customers have been asking for the same capabilities with Amazon Nova as they do when they customize open weights models in Amazon SageMaker Inference. They also wanted have more control and flexibility in custom model inference over instance types, auto-scaling policies, context length, and concurrency settings that production workloads demand.
Today, we’re announcing the general availability of custom Nova model support in Amazon SageMaker Inference, a production-grade, configurable, and cost-efficient managed inference service to deploy and scale full-rank customized Nova models. You can now experience an end-to-end customization journey to train Nova Micro, Nova Lite, and Nova 2 Lite models with reasoning capabilities using Amazon SageMaker Training Jobs or Amazon HyperPod and seamlessly deploy them with managed inference infrastructure of Amazon SageMaker AI.
With Amazon SageMaker Inference for custom Nova models, you can reduce inference cost through optimized GPU utilization using Amazon Elastic Compute Cloud (Amazon EC2) G5 and G6 instances over P5 instances, auto-scaling based on 5-minute usage patterns, and configurable inference parameters. This feature enables deployment of customized Nova models with continued pre-training, supervised fine-tuning, or reinforcement fine-tuning for your use cases. You can also set advanced configurations about context length, concurrency, and batch size for optimizing the latency-cost-accuracy tradeoff for your specific workloads.
Let’s see how to deploy customized Nova models on SageMaker AI real-time endpoints, configure inference parameters, and invoke your models for testing.
Deploy custom Nova models in SageMaker Inference
At AWS re:Invent 2025, we introduced new serverless customization in Amazon SageMaker AI for popular AI models including Nova models. With a few clicks, you can seamlessly select a model and customization technique, and handle model evaluation and deployment. If you already have a trained custom Nova model artifact, you can deploy the models on SageMaker Inference through the SageMaker Studio or SageMaker AI SDK.
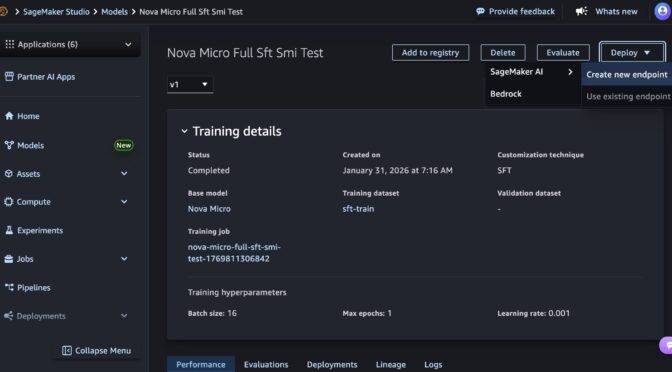
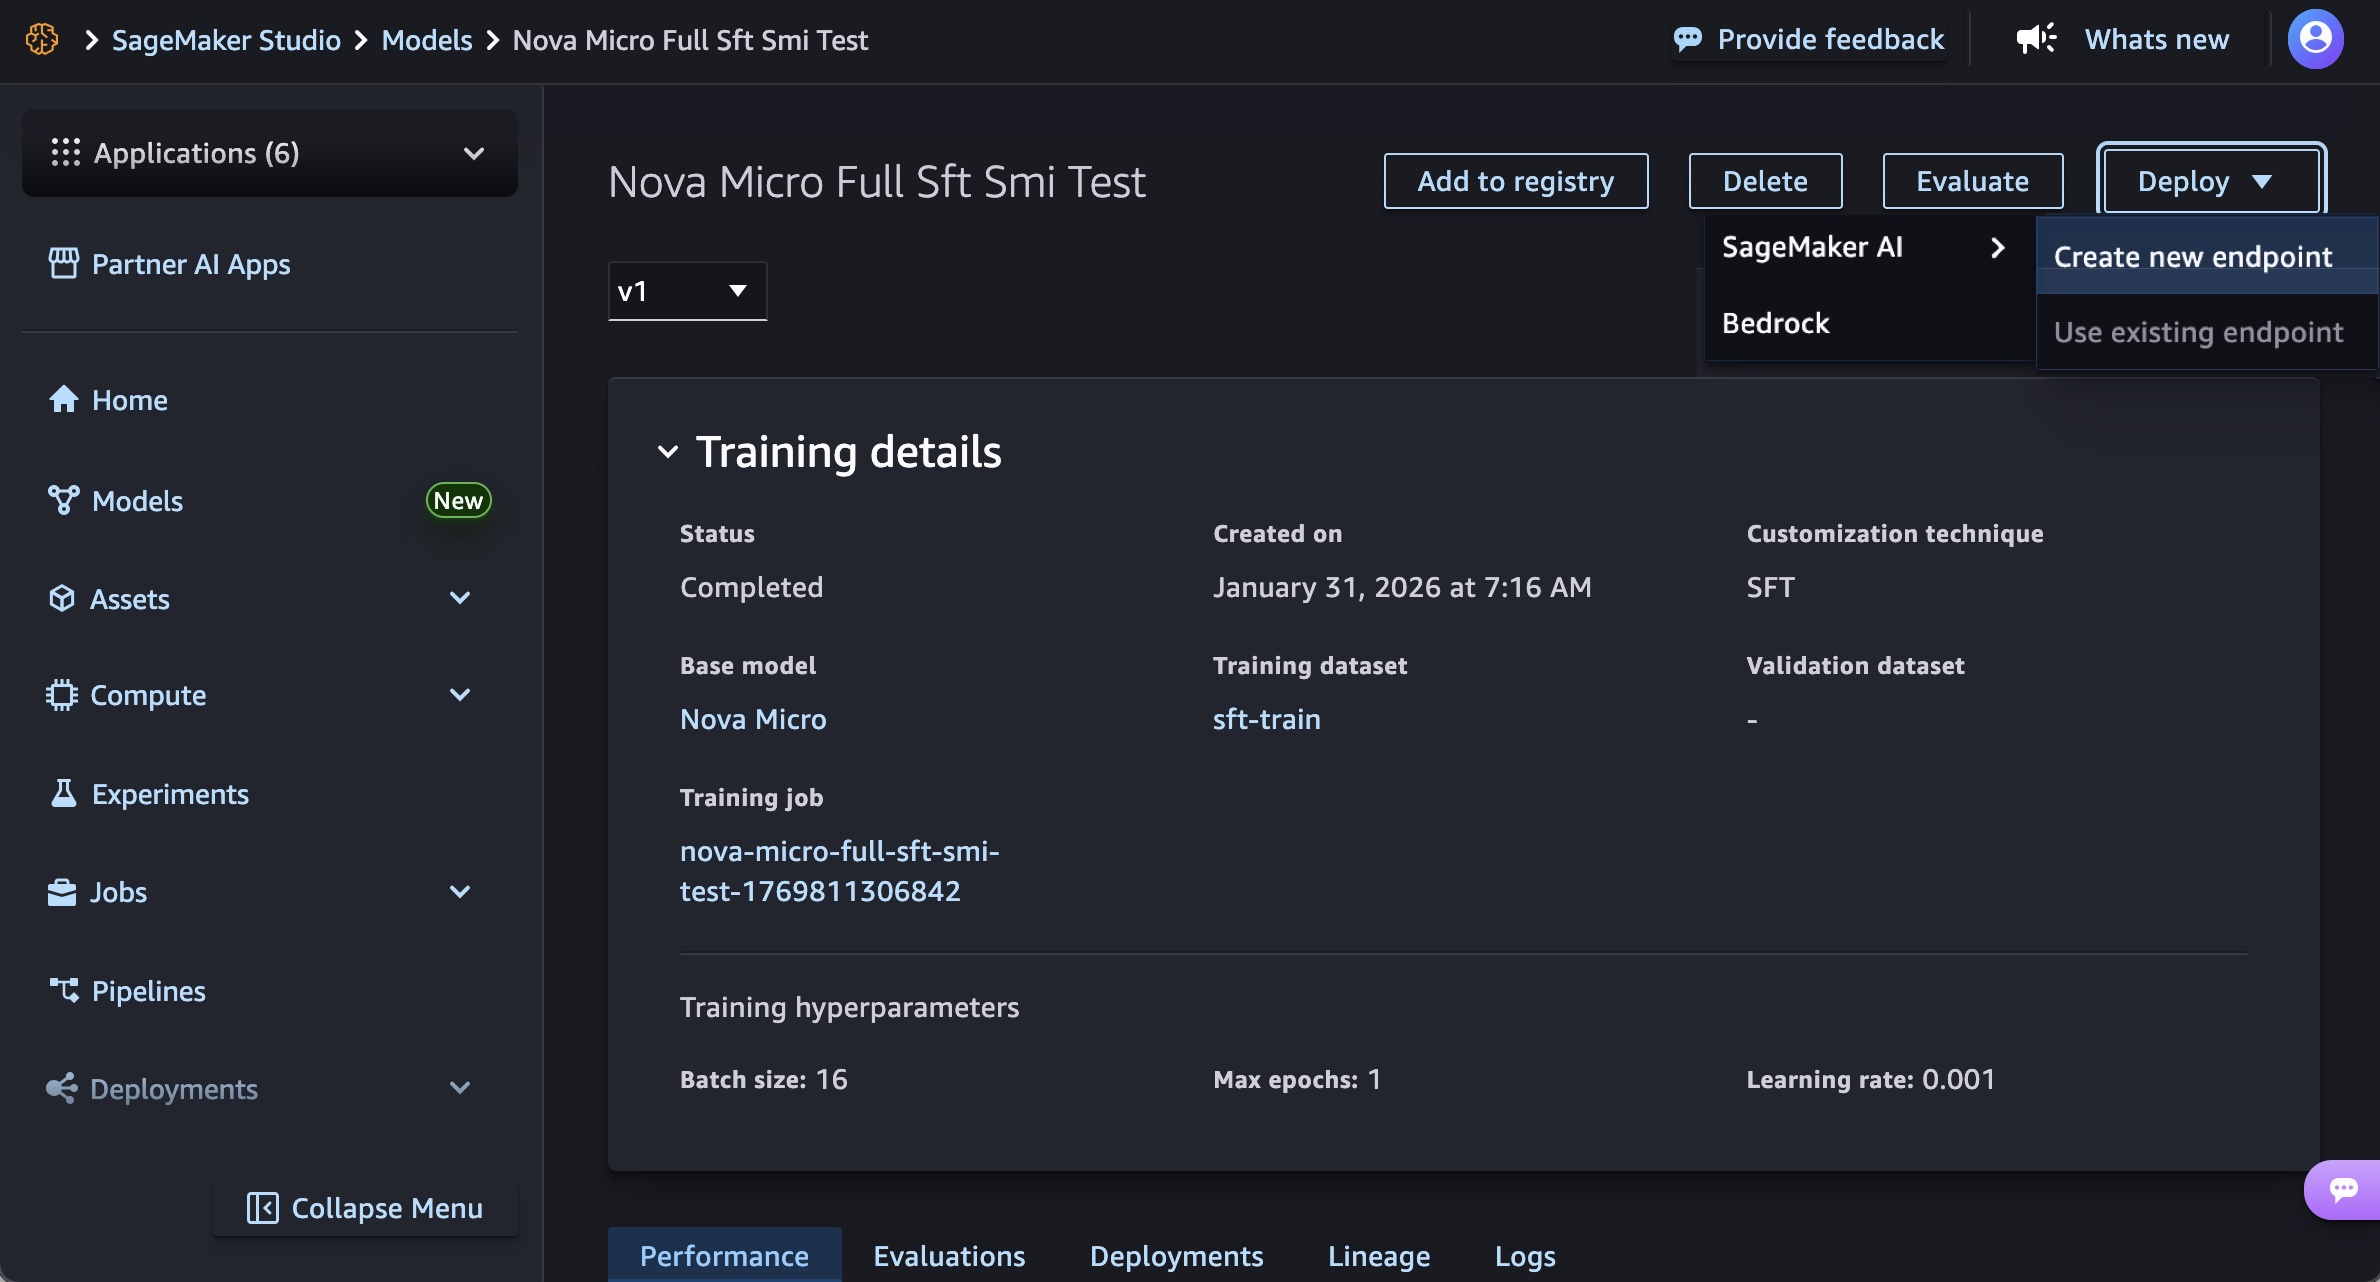
In the SageMaker Studio, choose a trained Nova model in Models in your models in the Models menu. You can deploy the model by choosing Deploy button, SageMaker AI and Create new endpoint.
Choose the endpoint name, instance type, and advanced options such as instance count, max instance count, permission and networking, and Deploy button. At GA launch, you can use g5.12xlarge, g5.24xlarge, g5.48xlarge, g6.12xlarge, g6.24xlarge, g6.48xlarge, and p5.48xlarge instance types for the Nova Micro model, g5.24xlarge, g5.48xlarge, g6.24xlarge, g6.48xlarge, and p5.48xlarge for the Nova Lite model, and p5.48xlarge for the Nova 2 Lite model.

Creating your endpoint requires time to provision the infrastructure, download your model artifacts, and initialize the inference container.
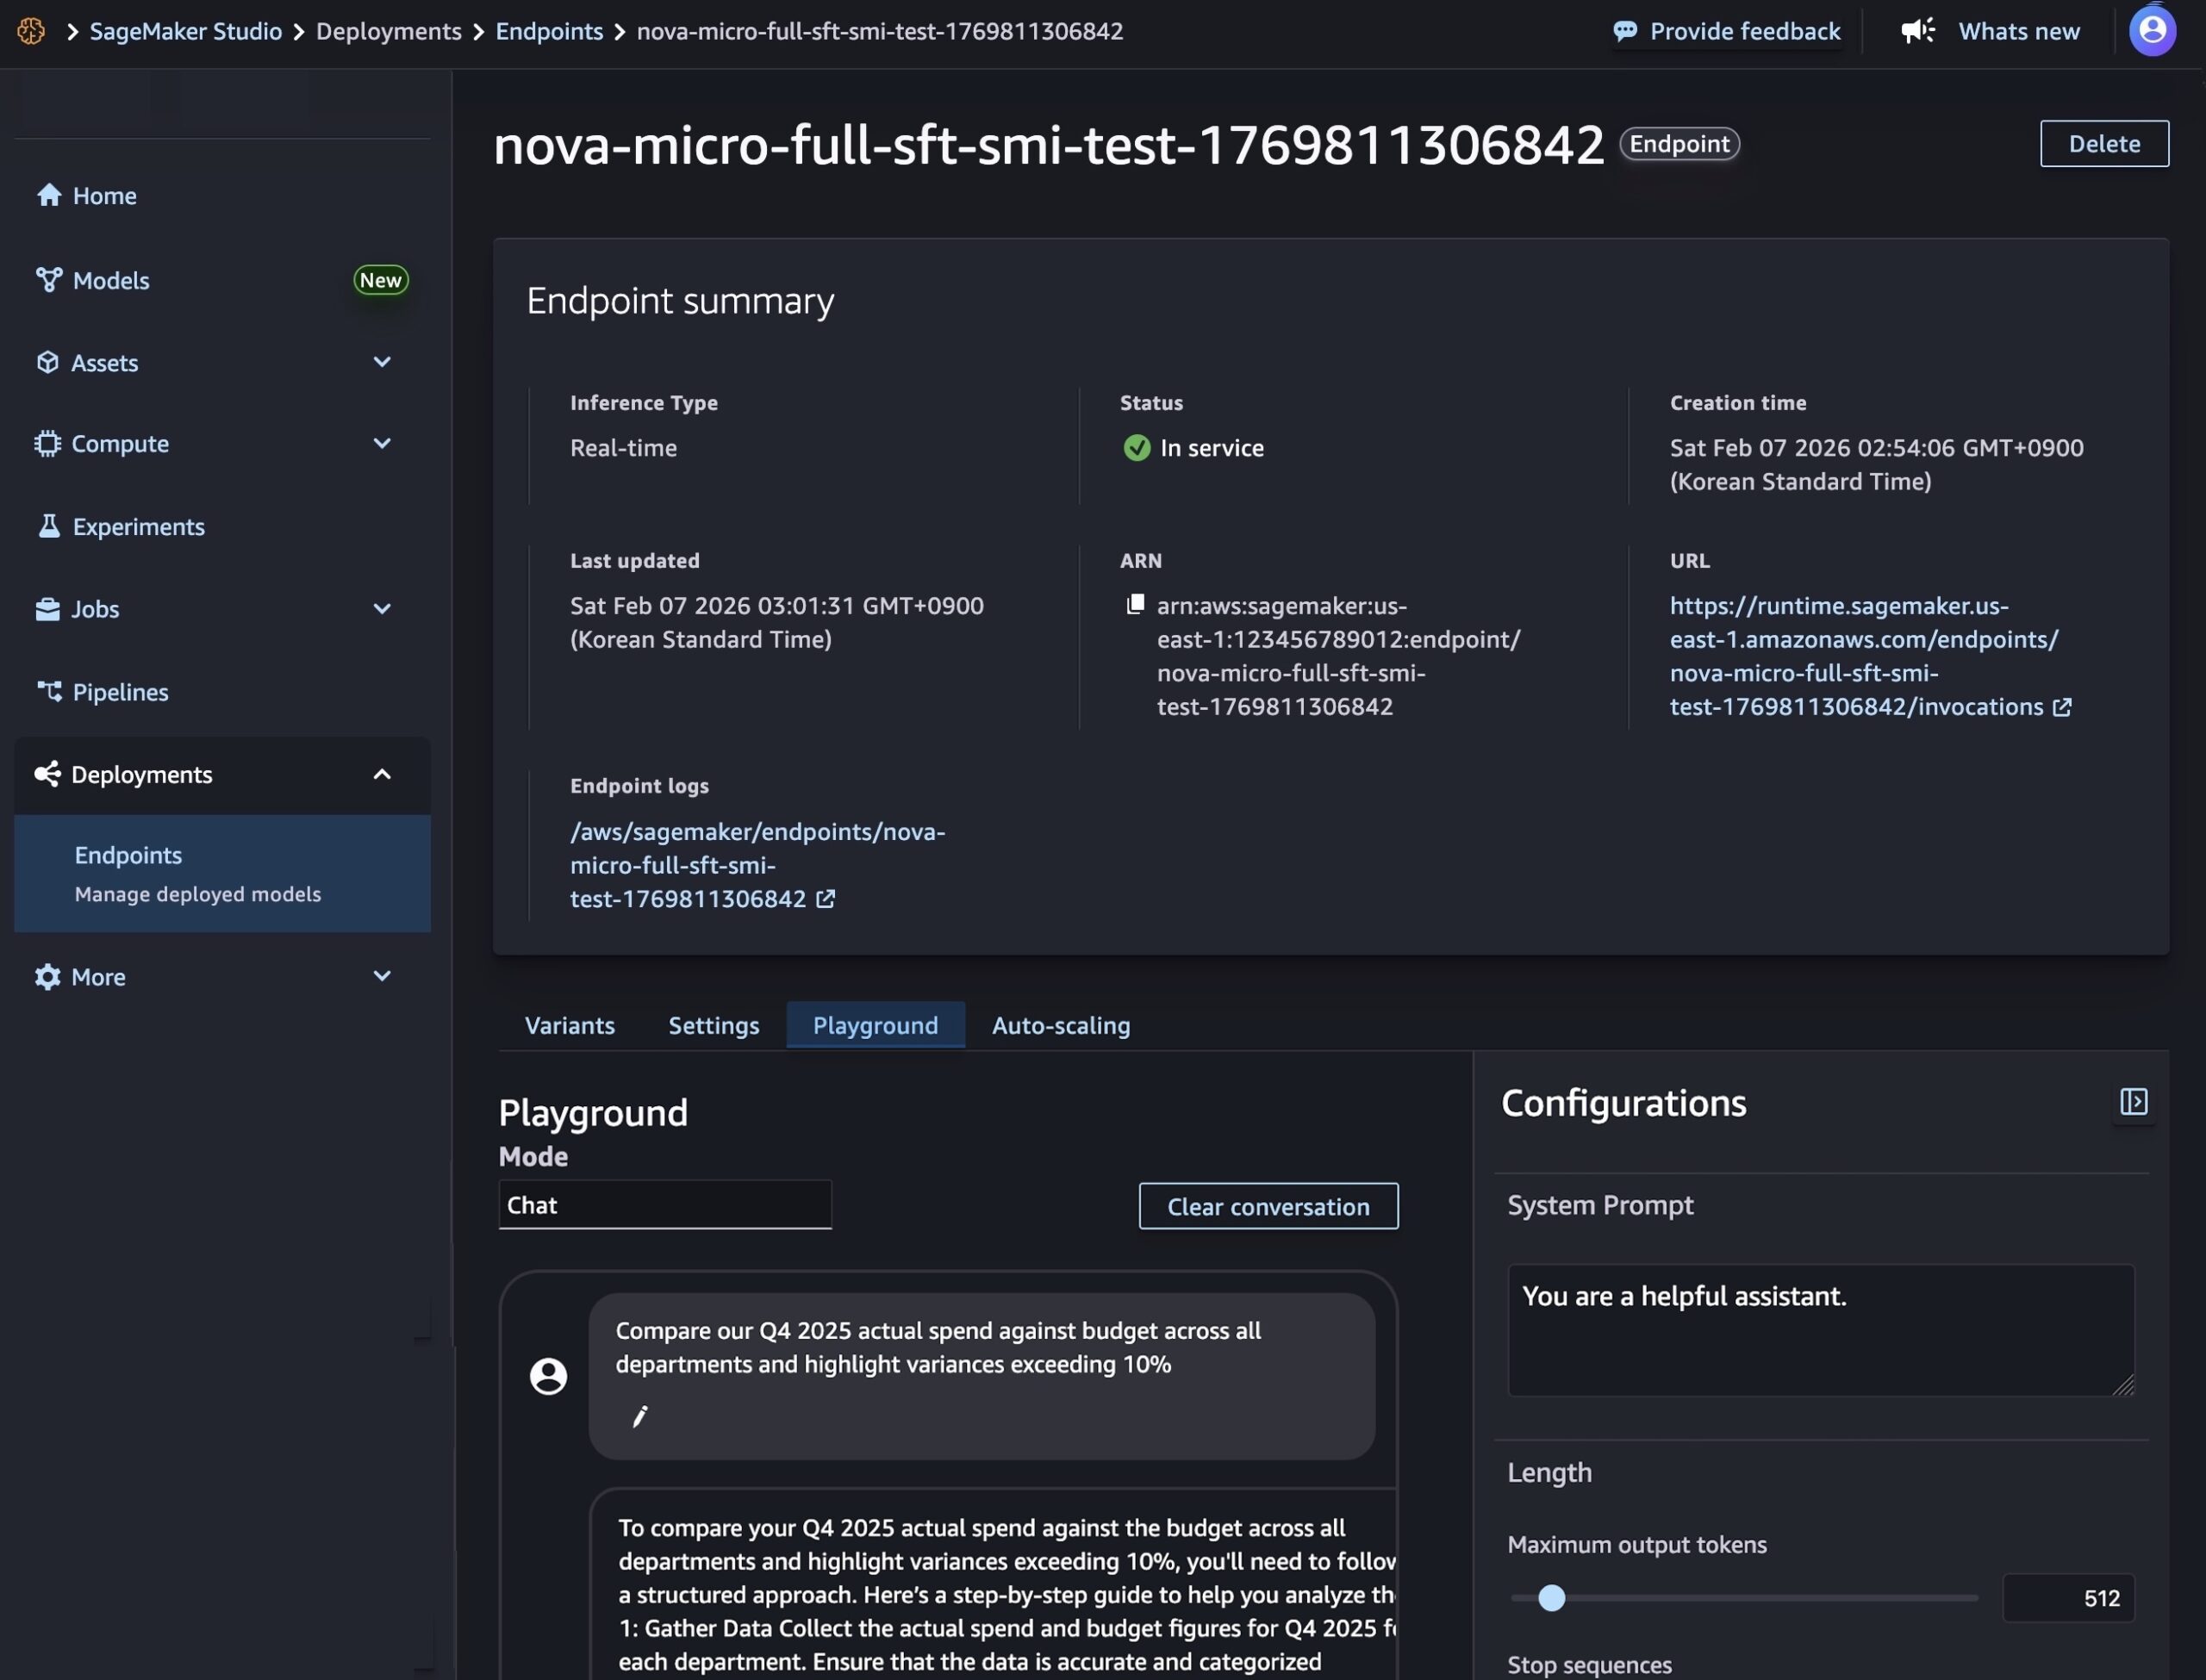
After model deployment completes and the endpoint status shows InService, you can perform real-time inference using the new endpoint. To test the model, choose the Playground tab and input your prompt in the Chat mode.
You can also use the SageMaker AI SDK to create two resources: a SageMaker AI model object that references your Nova model artifacts, and an endpoint configuration that defines how the model will be deployed.
The following code creates a SageMaker AI model that references your Nova model artifacts:
# Create a SageMaker AI model
    model_response = sagemaker.create_model(
        ModelName= 'Nova-micro-ml-g5-12xlarge',
        PrimaryContainer={
            'Image': '123456789012.dkr.ecr.us-east-1.amazonaws.com/nova-inference-repo:v1.0.0',
            'ModelDataSource': {
                'S3DataSource': {
                   'S3Uri': 's3://your-bucket-name/path/to/model/artifacts/',
                   'S3DataType': 'S3Prefix',
                   'CompressionType': 'None'
                }
            },
            # Model Parameters
            'Environment': {
                'CONTEXT_LENGTH': 8000,
                'CONCURRENCY': 16,
                'DEFAULT_TEMPERATURE': 0.0,
                'DEFAULT_TOP_P': 1.0
            }
        },
        ExecutionRoleArn=SAGEMAKER_EXECUTION_ROLE_ARN,
        EnableNetworkIsolation=True
    )
    print("Model created successfully!")
Next, create an endpoint configuration that defines your deployment infrastructure and deploy your Nova model by creating a SageMaker AI real-time endpoint. This endpoint will host your model and provide a secure HTTPS endpoint for making inference requests.
# Create Endpoint Configuration
    production_variant = {
        'VariantName': 'primary',
        'ModelName': 'Nova-micro-ml-g5-12xlarge',
        'InitialInstanceCount': 1,
        'InstanceType': 'ml.g5.12xlarge',
    }

    config_response = sagemaker.create_endpoint_config(
        EndpointConfigName= 'Nova-micro-ml-g5-12xlarge-Config',
        ProductionVariants= production_variant
    )
    print("Endpoint configuration created successfully!")

# Deploy your Noval model
    endpoint_response = sagemaker.create_endpoint(
        EndpointName= 'Nova-micro-ml-g5-12xlarge-endpoint',
        EndpointConfigName= 'Nova-micro-ml-g5-12xlarge-Config'
    )
    print("Endpoint creation initiated successfully!")
After the endpoint is created, you can send inference requests to generate predictions from your custom Nova model. Amazon SageMaker AI supports synchronous endpoints for real-time with streaming/non-streaming modes and asynchronous endpoints for batch processing.
For example, the following code creates streaming completion format for text generation:
# Streaming chat request with comprehensive parameters
streaming_request = {
"messages": [
        {"role": "user", "content": "Compare our Q4 2025 actual spend against budget across all departments and highlight variances exceeding 10%"}
    ],
    "max_tokens": 512,
    "stream": True,
    "temperature": 0.7,
    "top_p": 0.95,
    "top_k": 40,
    "logprobs": True,
    "top_logprobs": 2,
    "reasoning_effort": "low",  # Options: "low", "high"
    "stream_options": {"include_usage": True}
}

invoke_nova_endpoint(streaming_request)

def invoke_nova_endpoint(request_body):
"""
    Invoke Nova endpoint with automatic streaming detection.

    Args:
        request_body (dict): Request payload containing prompt and parameters

    Returns:
        dict: Response from the model (for non-streaming requests)
        None: For streaming requests (prints output directly)
    """
    body = json.dumps(request_body)
    is_streaming = request_body.get("stream", False)

    try:
        print(f"Invoking endpoint ({'streaming' if is_streaming else 'non-streaming'})...")

        if is_streaming:
            response = runtime_client.invoke_endpoint_with_response_stream(
                EndpointName=ENDPOINT_NAME,
                ContentType='application/json',
                Body=body
            )

            event_stream = response['Body']
            for event in event_stream:
                if 'PayloadPart' in event:
                    chunk = event['PayloadPart']
                    if 'Bytes' in chunk:
                        data = chunk['Bytes'].decode()
                        print("Chunk:", data)
        else:
            # Non-streaming inference
            response = runtime_client.invoke_endpoint(
                EndpointName=ENDPOINT_NAME,
                ContentType='application/json',
                Accept='application/json',
                Body=body
            )

            response_body = response['Body'].read().decode('utf-8')
            result = json.loads(response_body)
            print("✅ Response received successfully")
            return result

    except ClientError as e:
        error_code = e.response['Error']['Code']
        error_message = e.response['Error']['Message']
        print(f"❌ AWS Error: {error_code} - {error_message}")
    except Exception as e:
        print(f"❌ Unexpected error: {str(e)}")
To use full code examples, visit Customizing Amazon Nova models on Amazon SageMaker AI. To learn more about best practices on deploying and managing models, visit Best Practices for SageMaker AI.
Now available
Amazon SageMaker Inference for custom Nova models is available today in US East (N. Virginia) and US West (Oregon) AWS Regions. For Regional availability and a future roadmap, visit the AWS Capabilities by Region.
The feature supports Nova Micro, Nova Lite, and Nova 2 Lite models with reasoning capabilities, running on EC2 G5, G6, and P5 instances with auto-scaling support. You pay only for the compute instances you use, with per-hour billing and no minimum commitments. For more information, visit Amazon SageMaker AI Pricing page.
Give it a try in Amazon SageMaker AI console and send feedback to AWS re:Post for SageMaker or through your usual AWS Support contacts.
— Channy