Today we’re announcing a faster way to get started with your existing AWS datasets in Amazon SageMaker Unified Studio. You can now start working with any data you have access to in a new serverless notebook with a built-in AI agent, using your existing AWS Identity and Access Management (IAM) roles and permissions.
New updates include:
- One-click onboarding – Amazon SageMaker can now automatically create a project in Unified Studio with all your existing data permissions from AWS Glue Data Catalog, AWS Lake Formation, and Amazon Simple Storage Services (Amazon S3).
- Direct integration – You can launch SageMaker Unified Studio directly from Amazon SageMaker, Amazon Athena, Amazon Redshift, and Amazon S3 Tables console pages, giving a fast path to analytics and AI workloads.
- Notebooks with a built-in AI agent – You can use a new serverless notebook with a built-in AI agent, which supports SQL, Python, Spark, or natural language and gives data engineers, analysts, and data scientists one place to develop and run both SQL queries and code.
You also have access to other tools such as a Query Editor for SQL analysis, JupyterLab integrated developer environment (IDE), Visual ETL and workflows, and machine learning (ML) capabilities.
Try one-click onboarding and connect to Amazon SageMaker Unified Studio
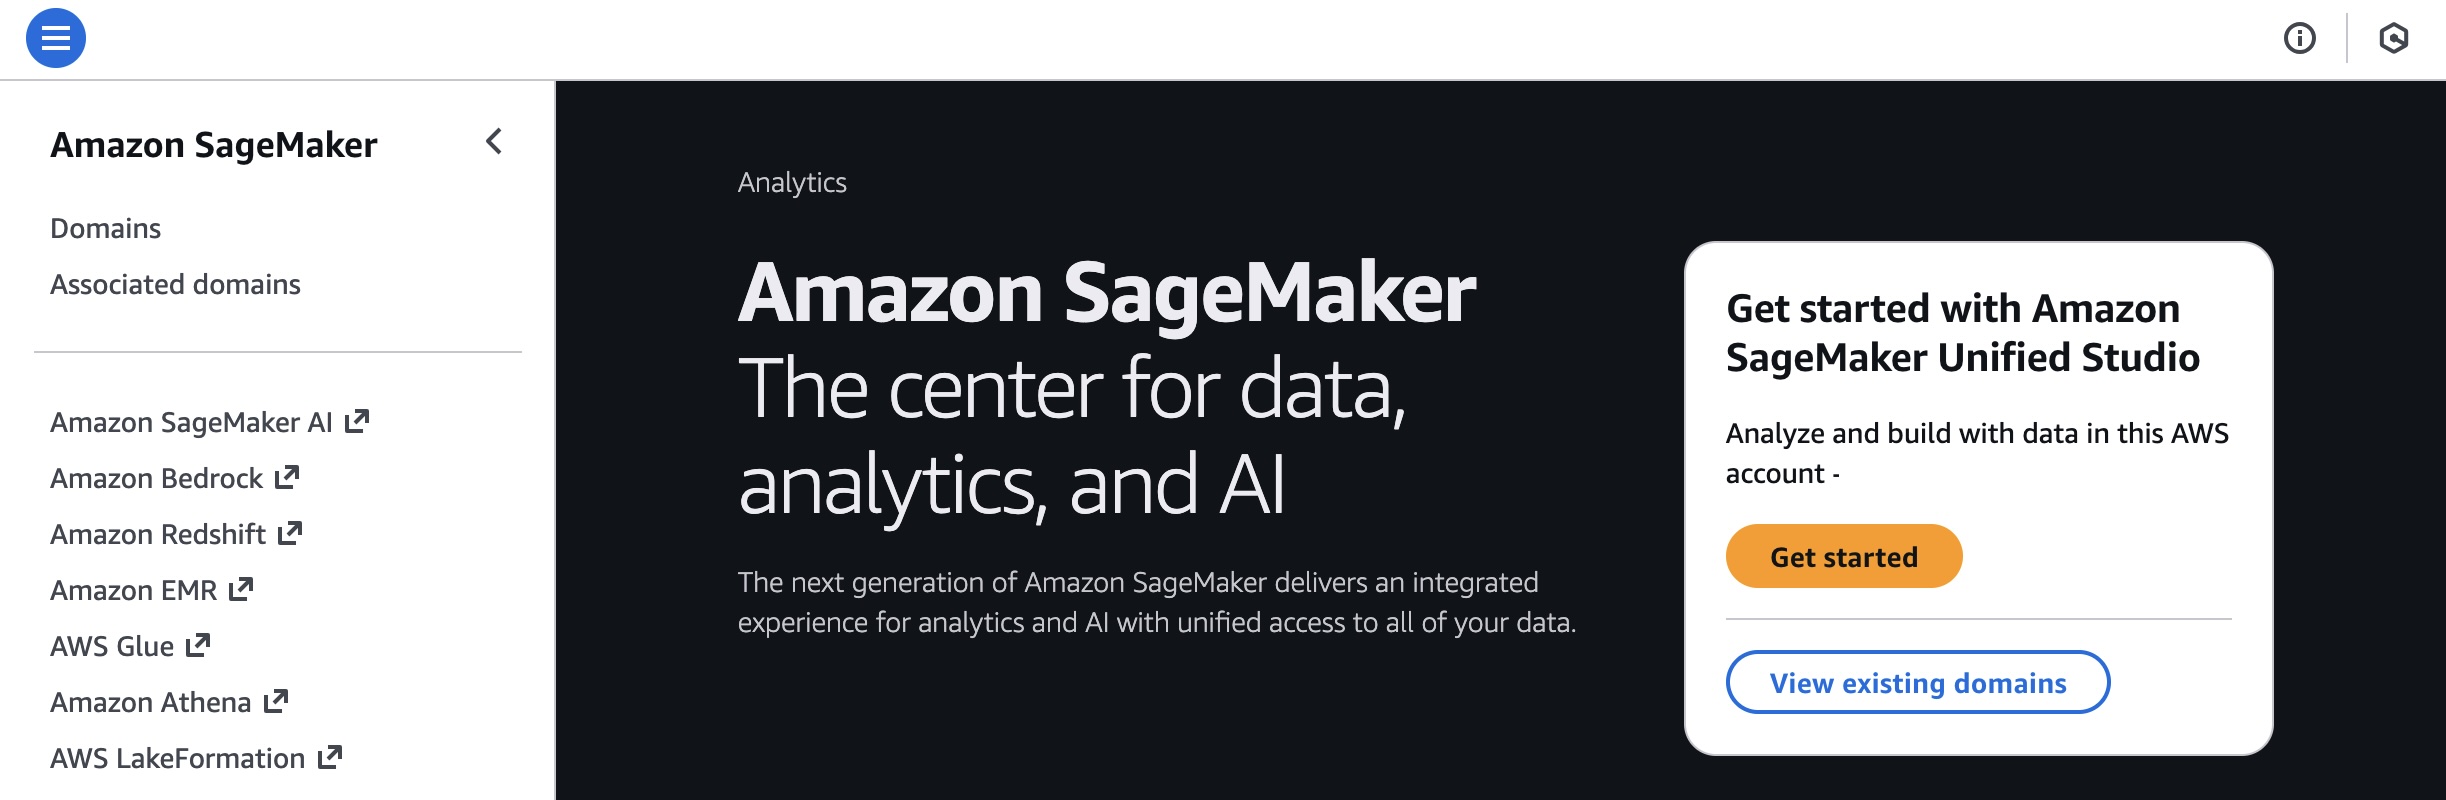
To get started, go to the SageMaker console and choose the Get started button.
You will be prompted either to select an existing AWS Identity and Access Management (AWS IAM) role that has access to your data and compute, or to create a new role.
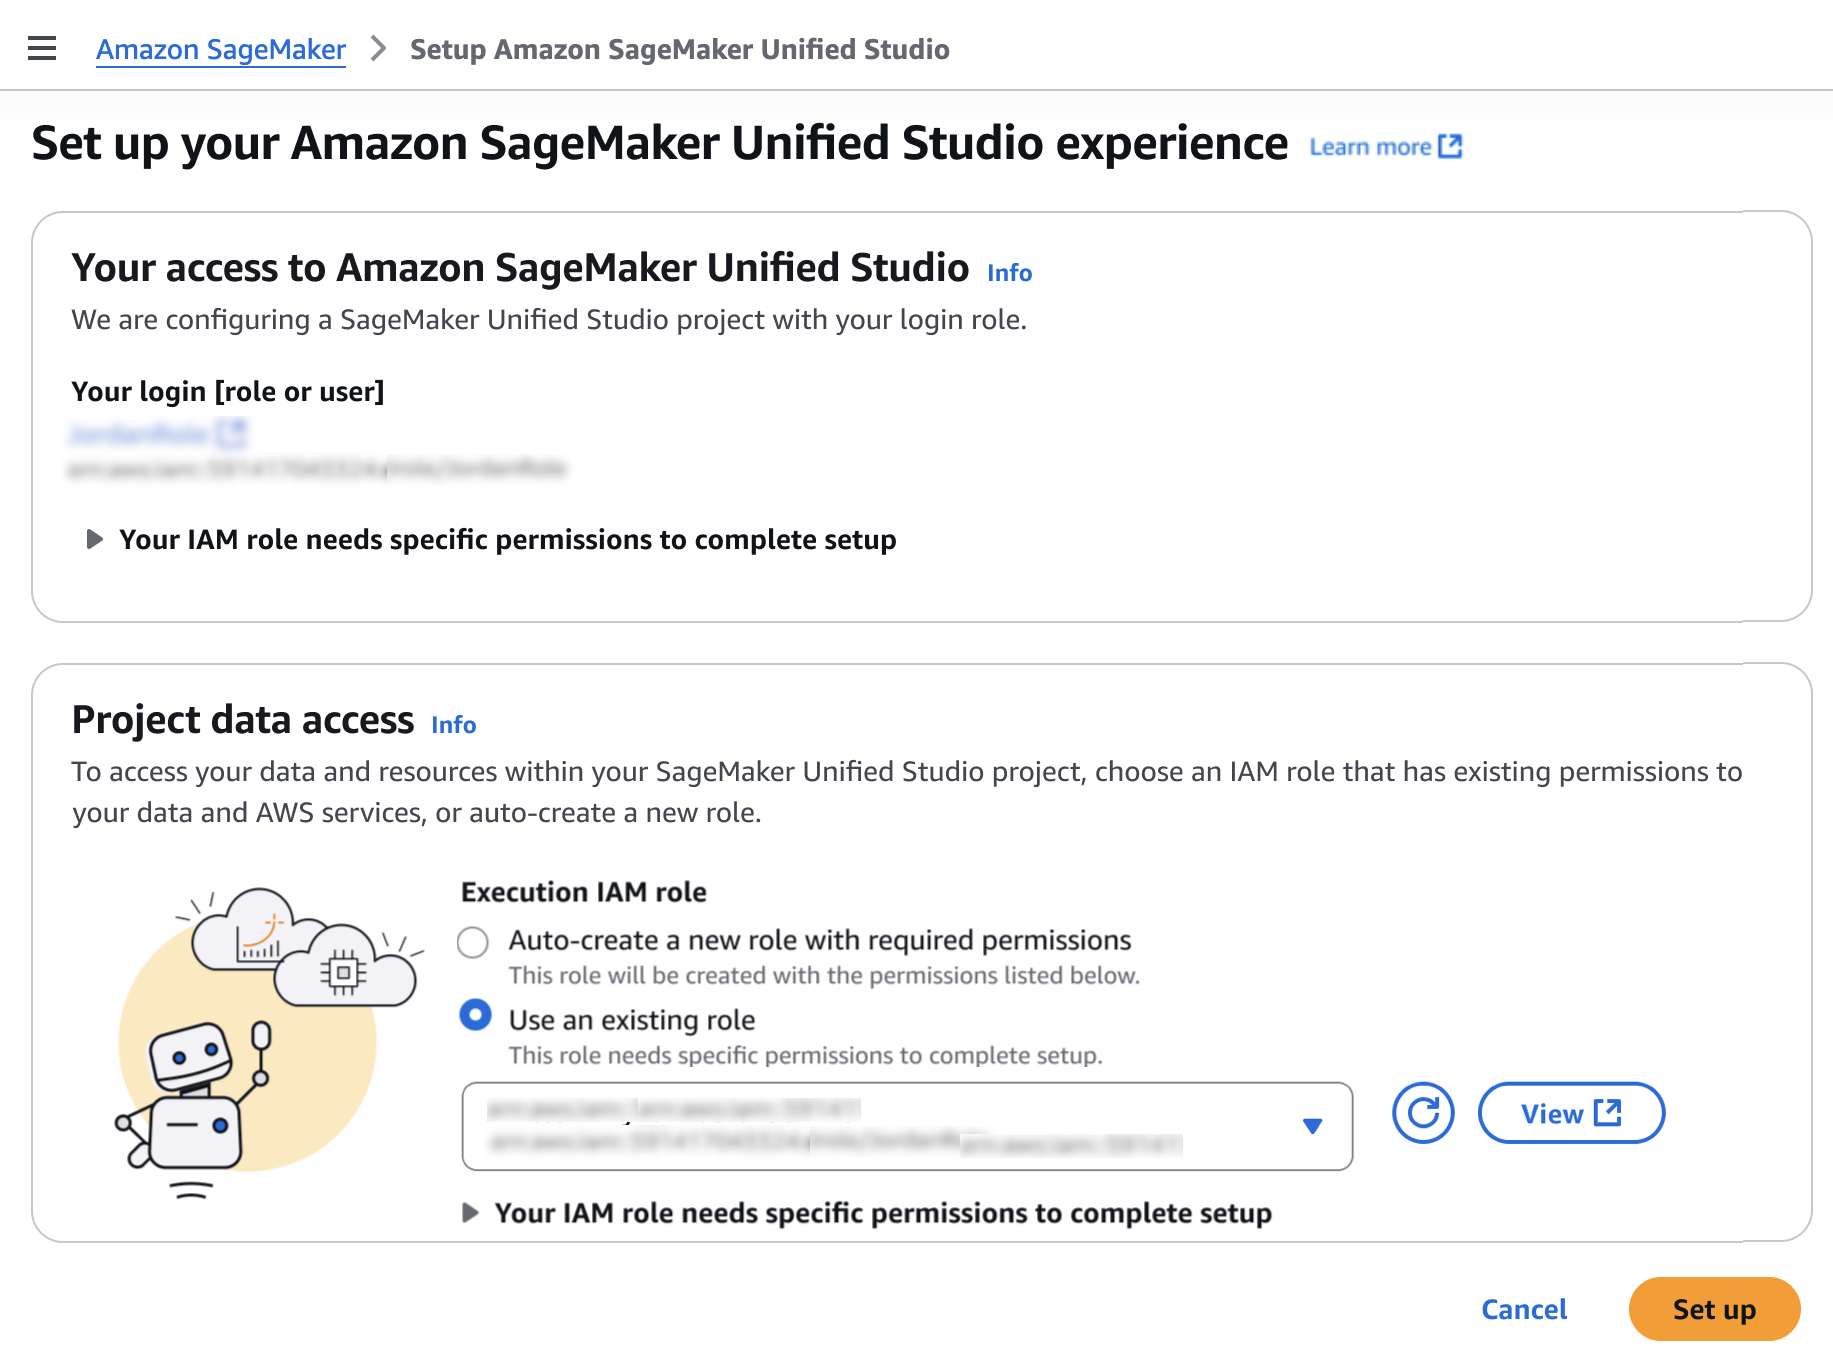
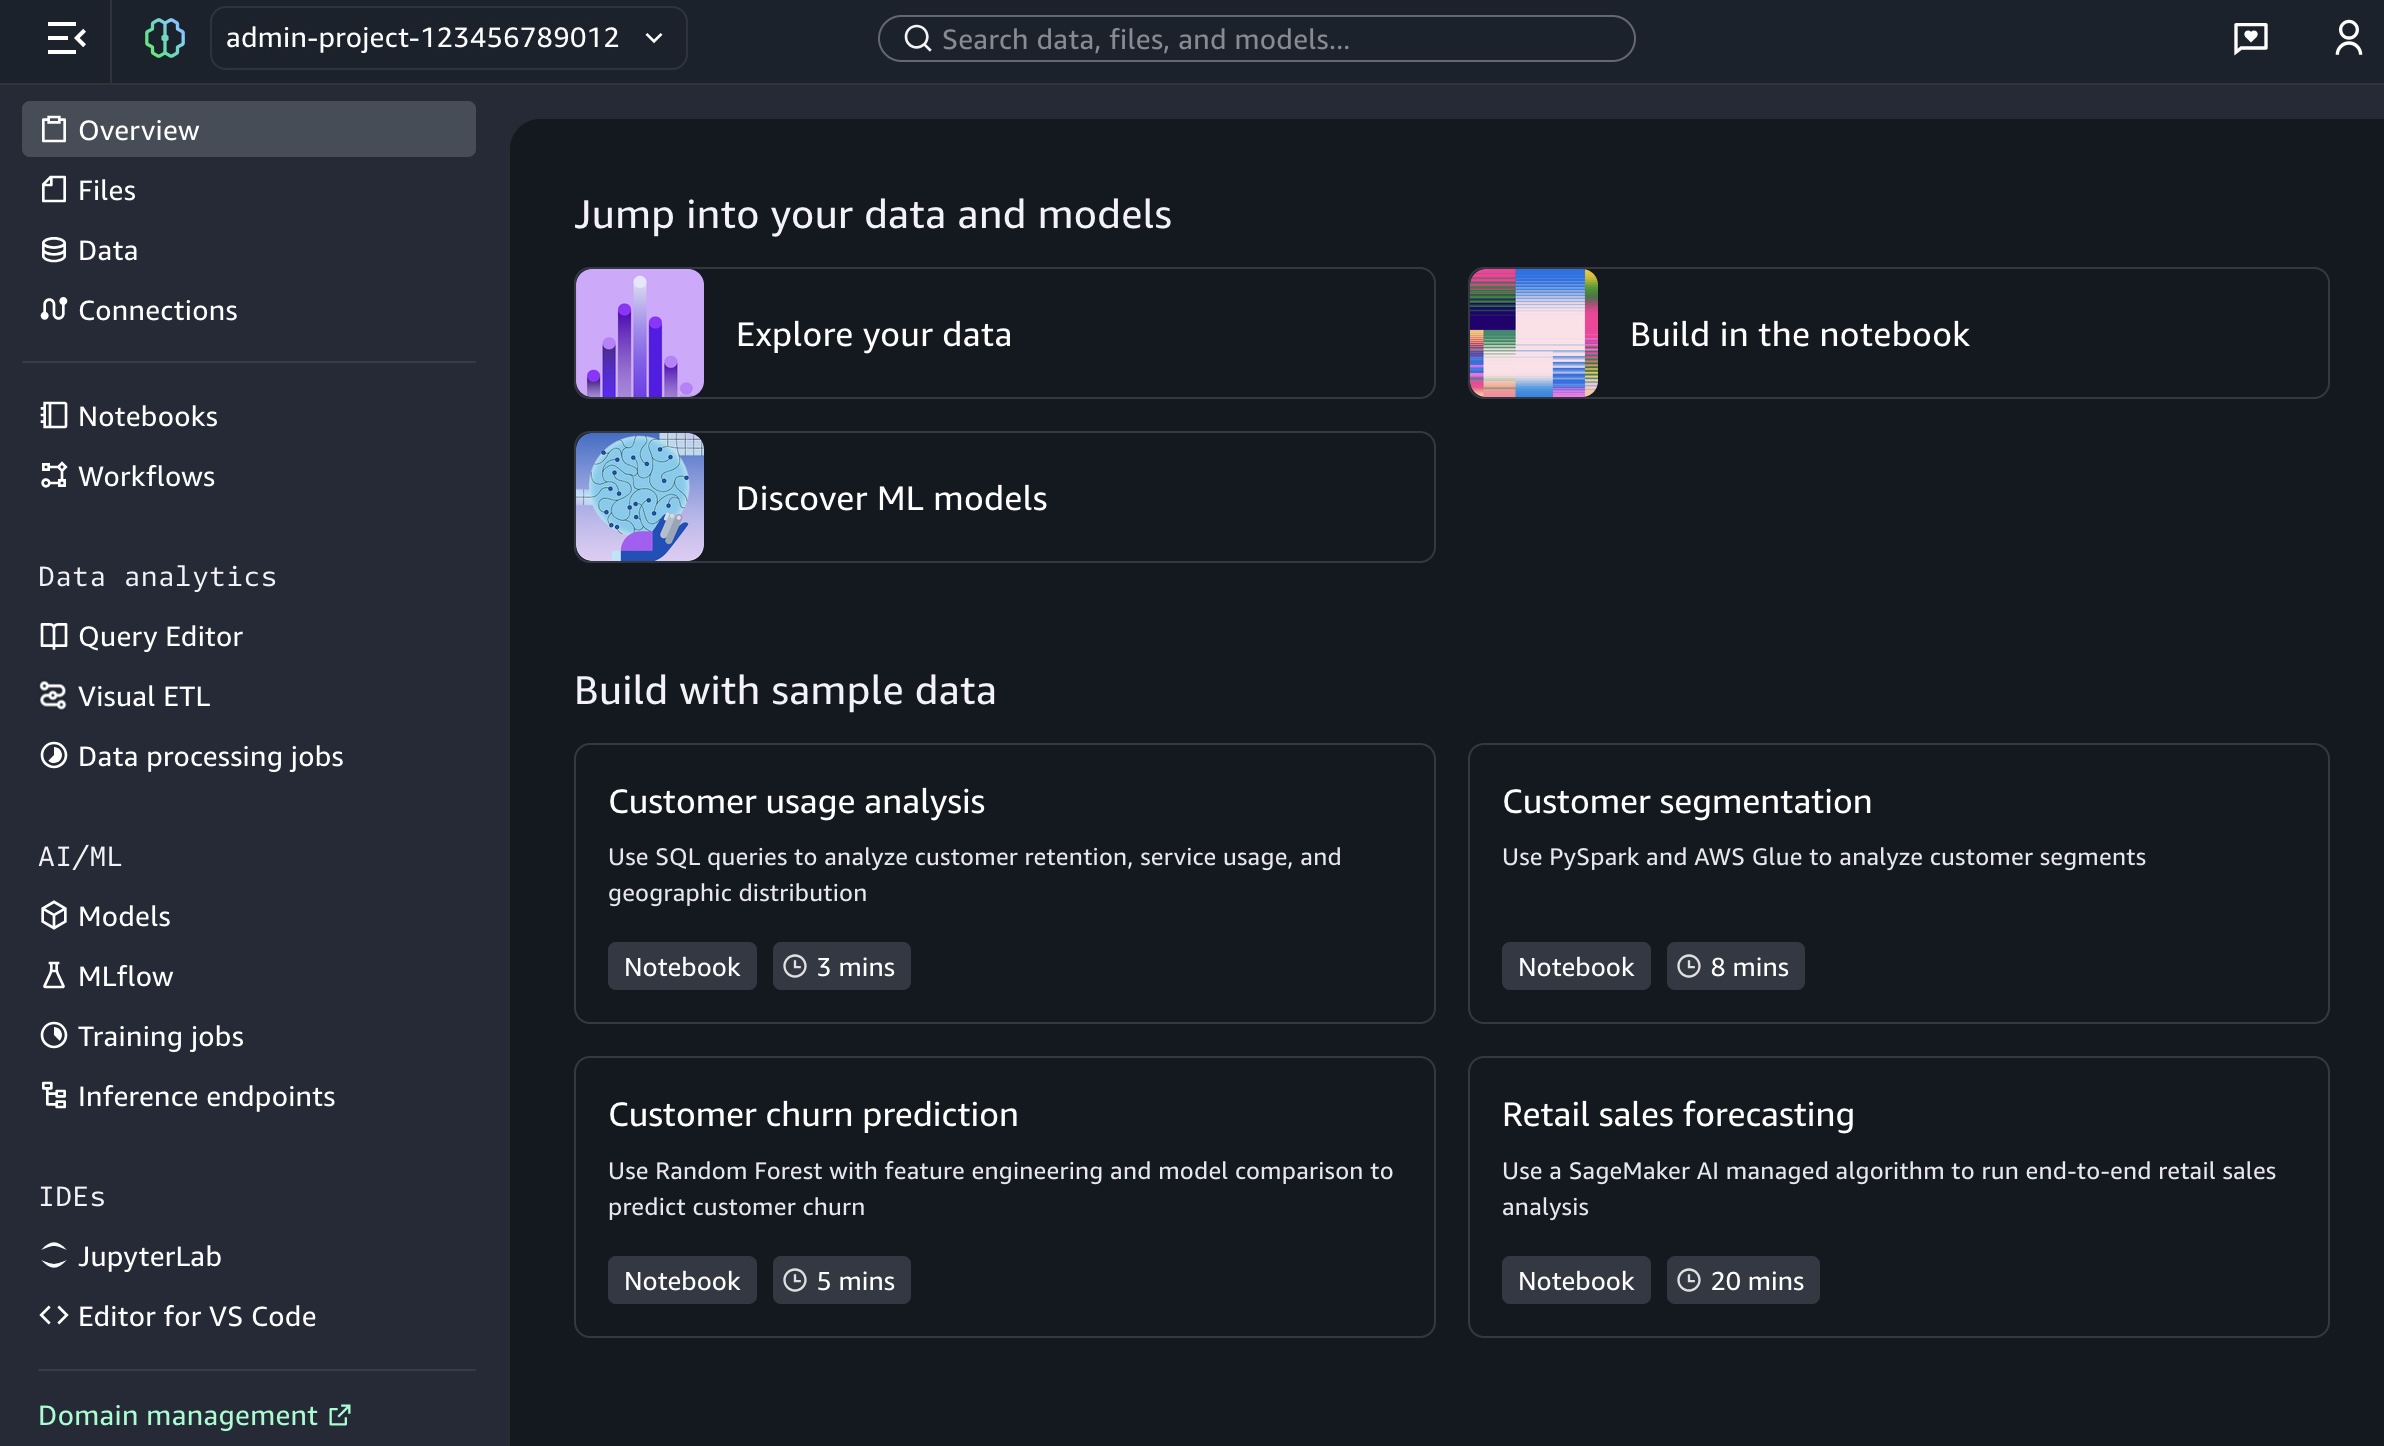
Choose Set up. It takes a few minutes to complete your environment. After this role is granted access, you’ll be taken to the SageMaker Unified Studio landing page where you will see the datasets that you have access to in AWS Glue Data Catalog as well as a variety of analytics and AI tools to work with.
This environment automatically creates the following serverless compute: Amazon Athena Spark, Amazon Athena SQL, AWS Glue Spark, and Amazon Managed Workflows for Apache Airflow (MWAA) serverless. This means you completely skip provisioning and can start working immediately with just-in-time compute resources, and it automatically scales back down when you finish, helping to save on costs.
You can also get started working on specific tables in Amazon Athena, Amazon Redshift, and Amazon S3 Tables. For example, you can select Query your data in Amazon SageMaker Unified Studio and then choose Get started in Amazon Athena console.
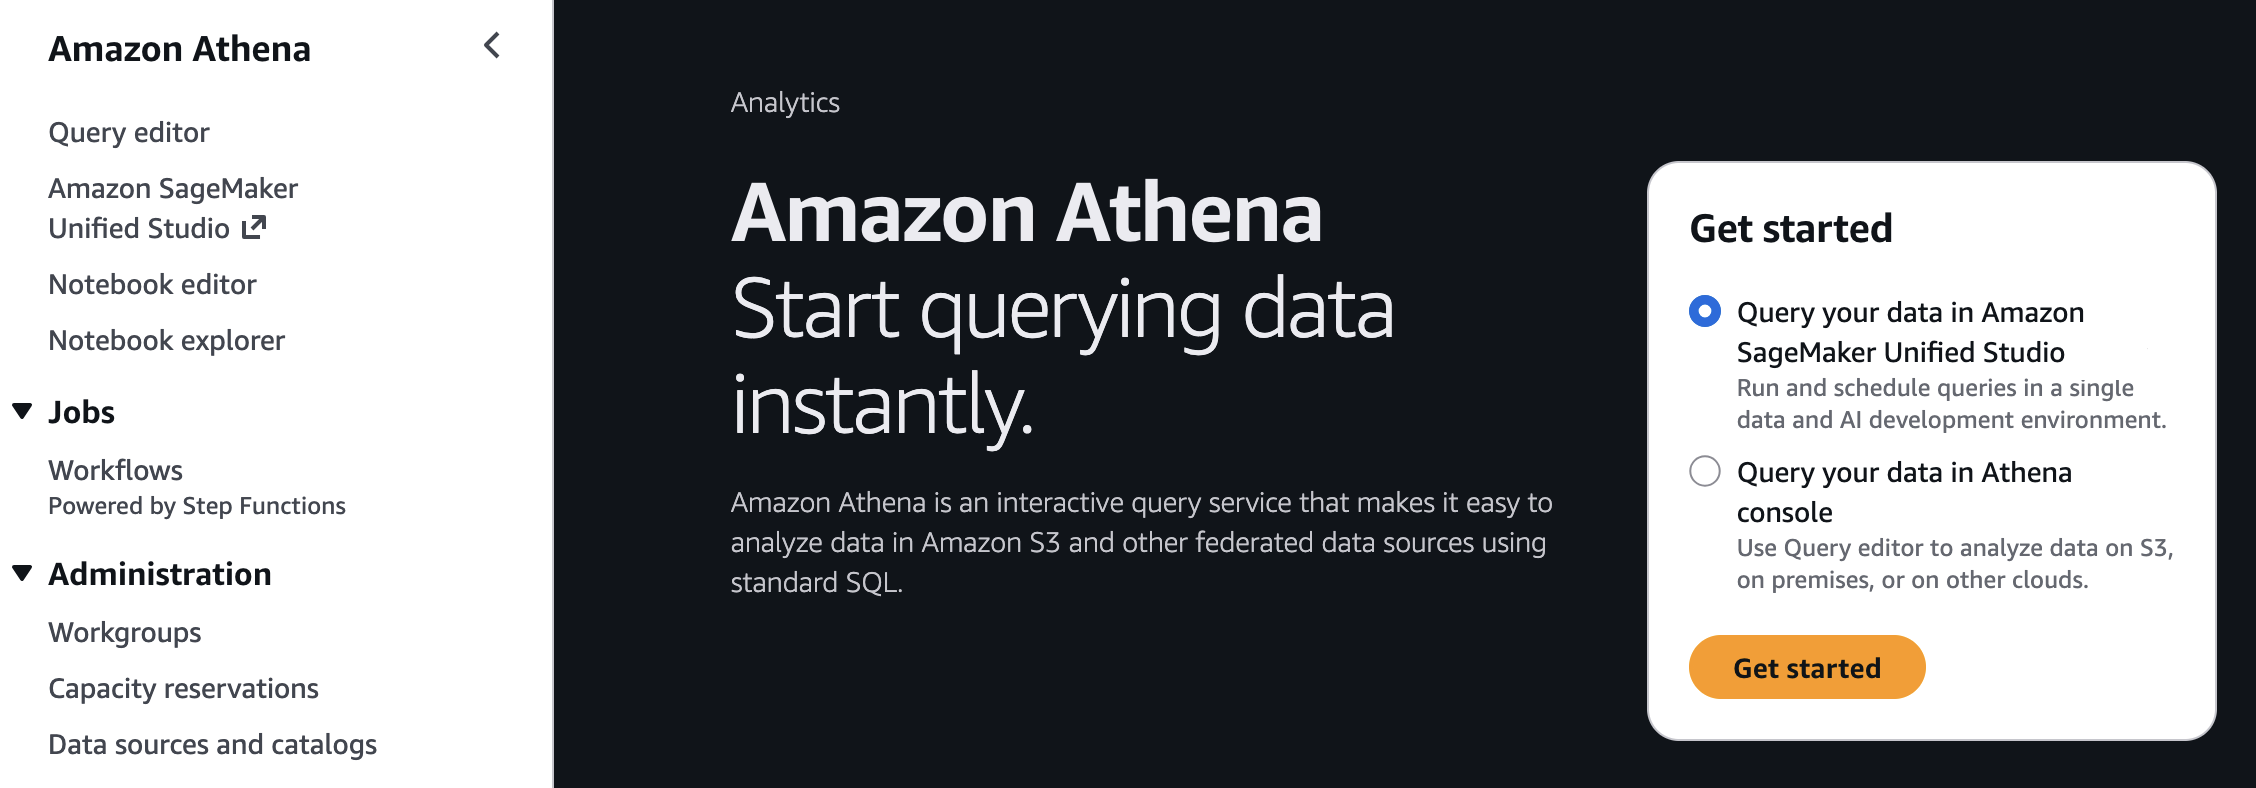
If you start from these consoles, you’ll connect directly to the Query Editor with the data that you were looking at already accessible, and your previous query context preserved. By using this context-aware routing, you can run queries immediately once inside the SageMaker Unified Studio without unnecessary navigation.
Getting started with notebooks with a built-in AI agent
Amazon SageMaker is introducing a new notebook experience that provides data and AI teams with a high-performance, serverless programming environment for analytics and ML jobs. The new notebook experience includes Amazon SageMaker Data Agent, a built-in AI agent that accelerates development by generating code and SQL statements from natural language prompts while guiding users through their tasks.
To start a new notebook, choose the Notebooks menu in the left navigation pane to run SQL queries, Python code, and natural language, and to discover, transform, analyze, visualize, and share insights on data. You can get started with sample data such as customer analytics and retail sales forecasting.
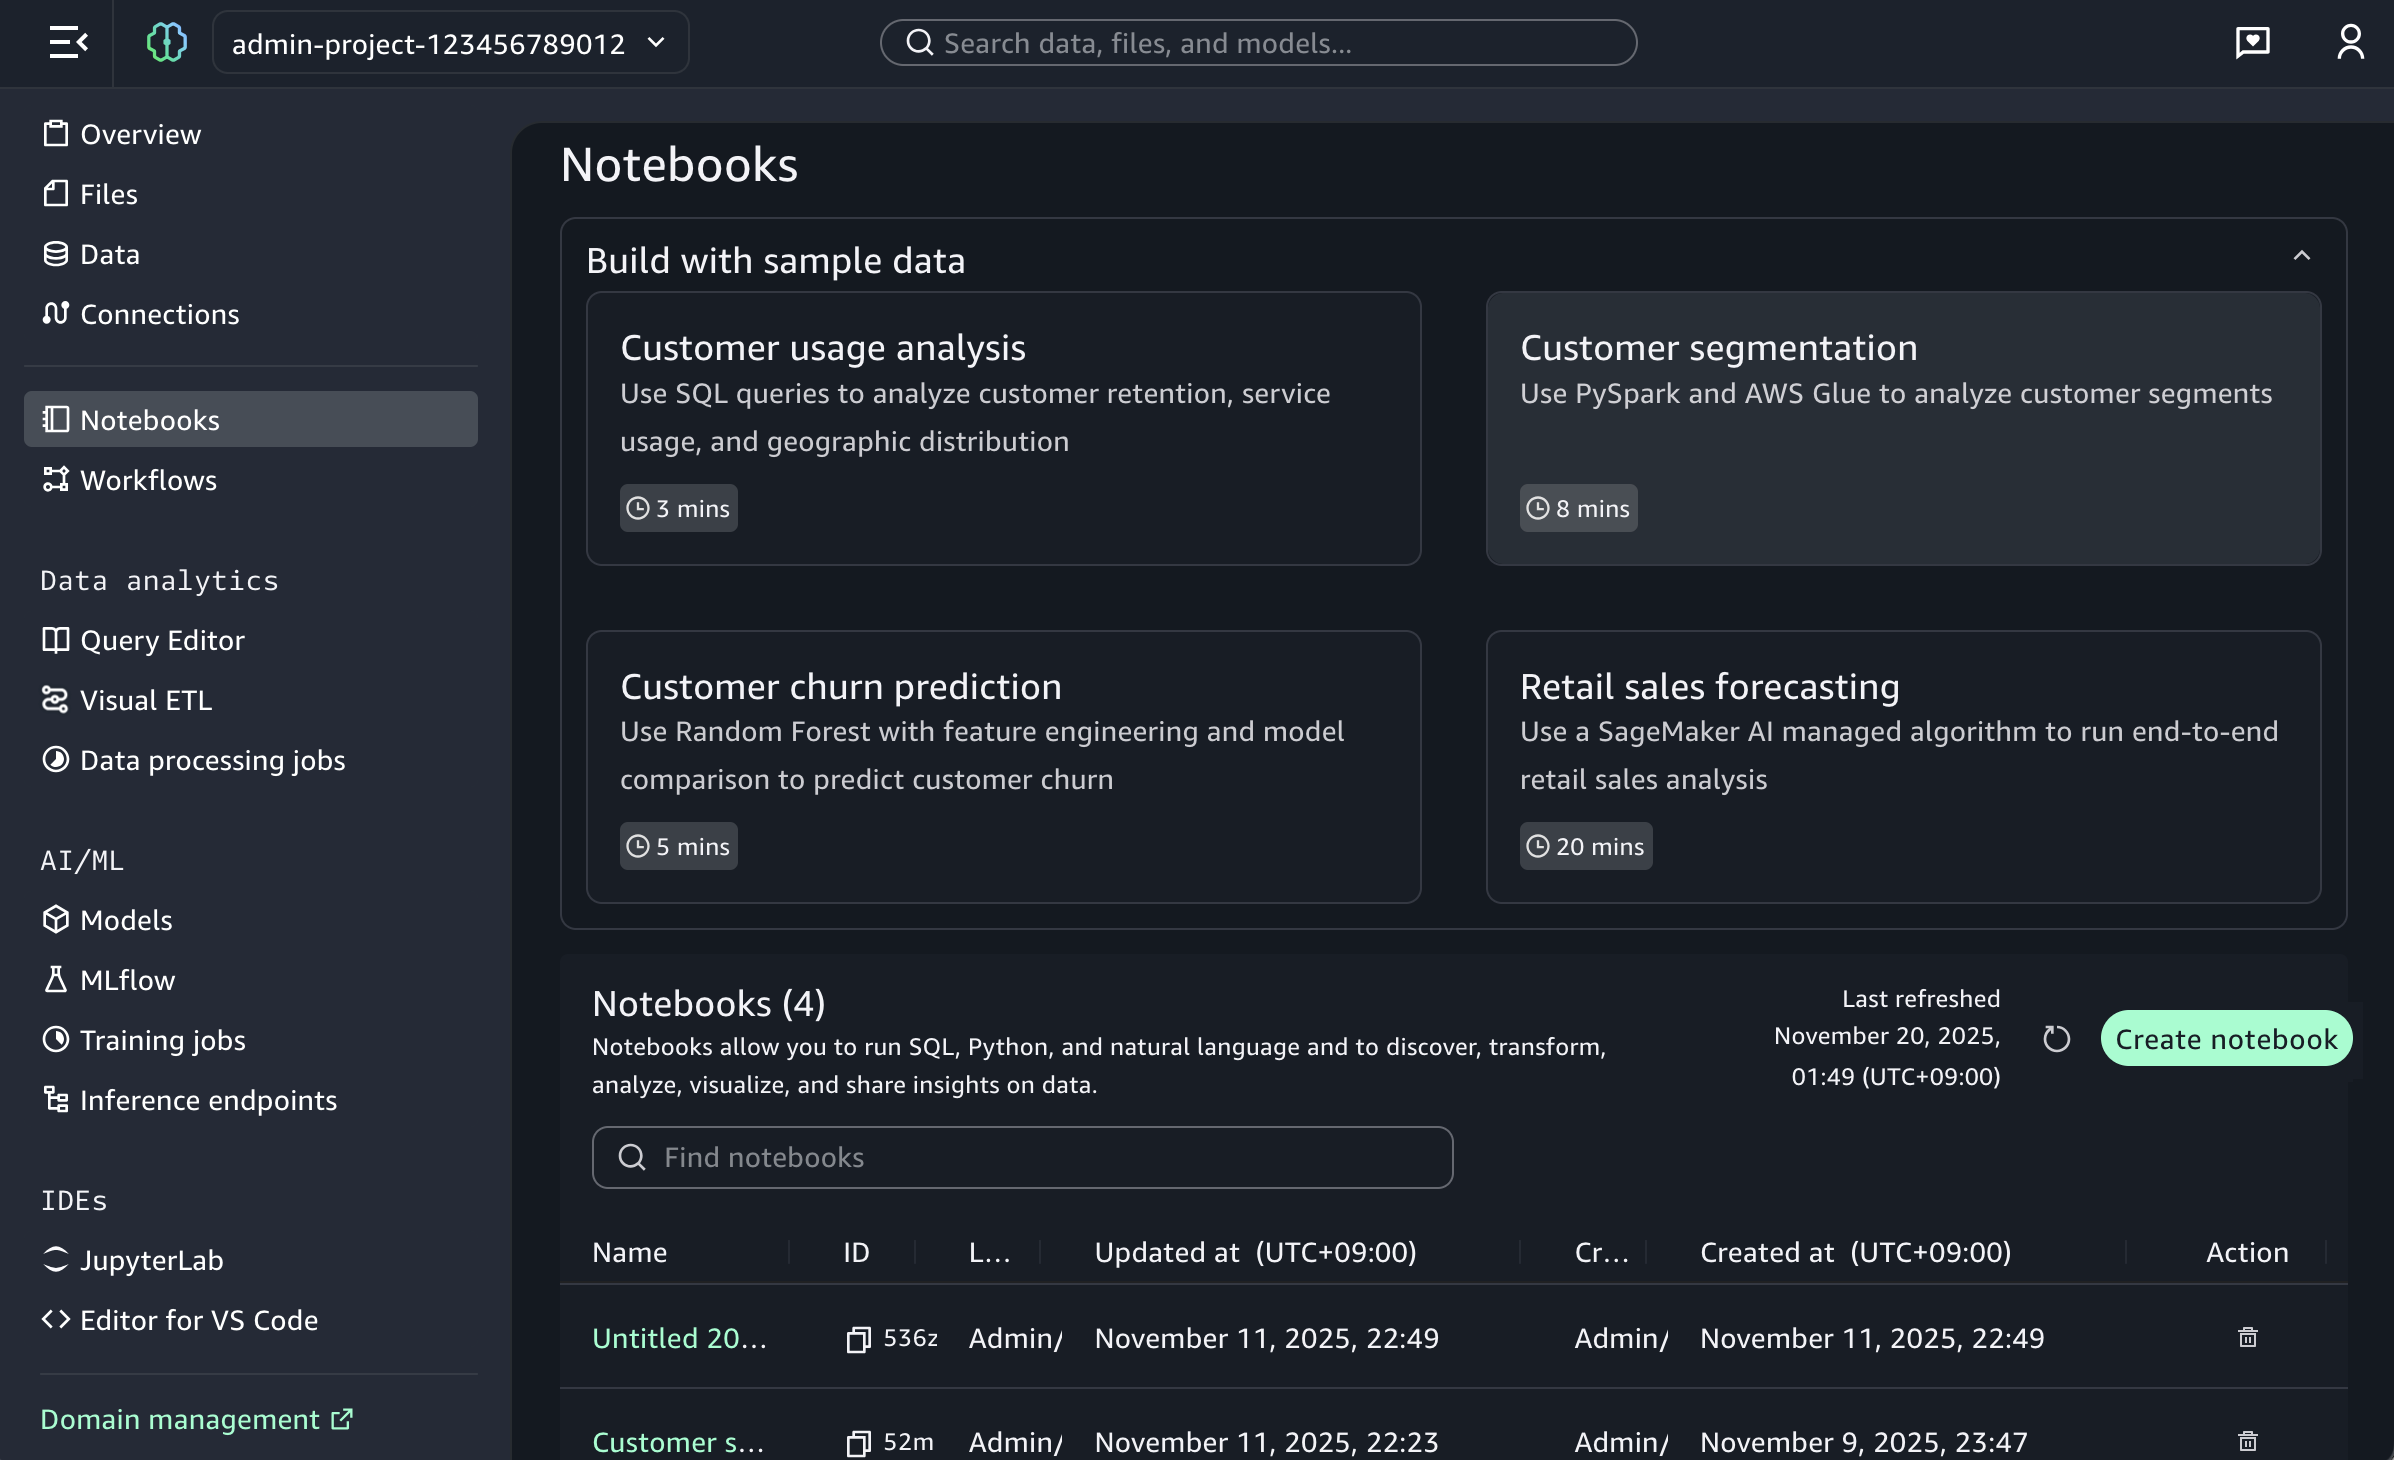
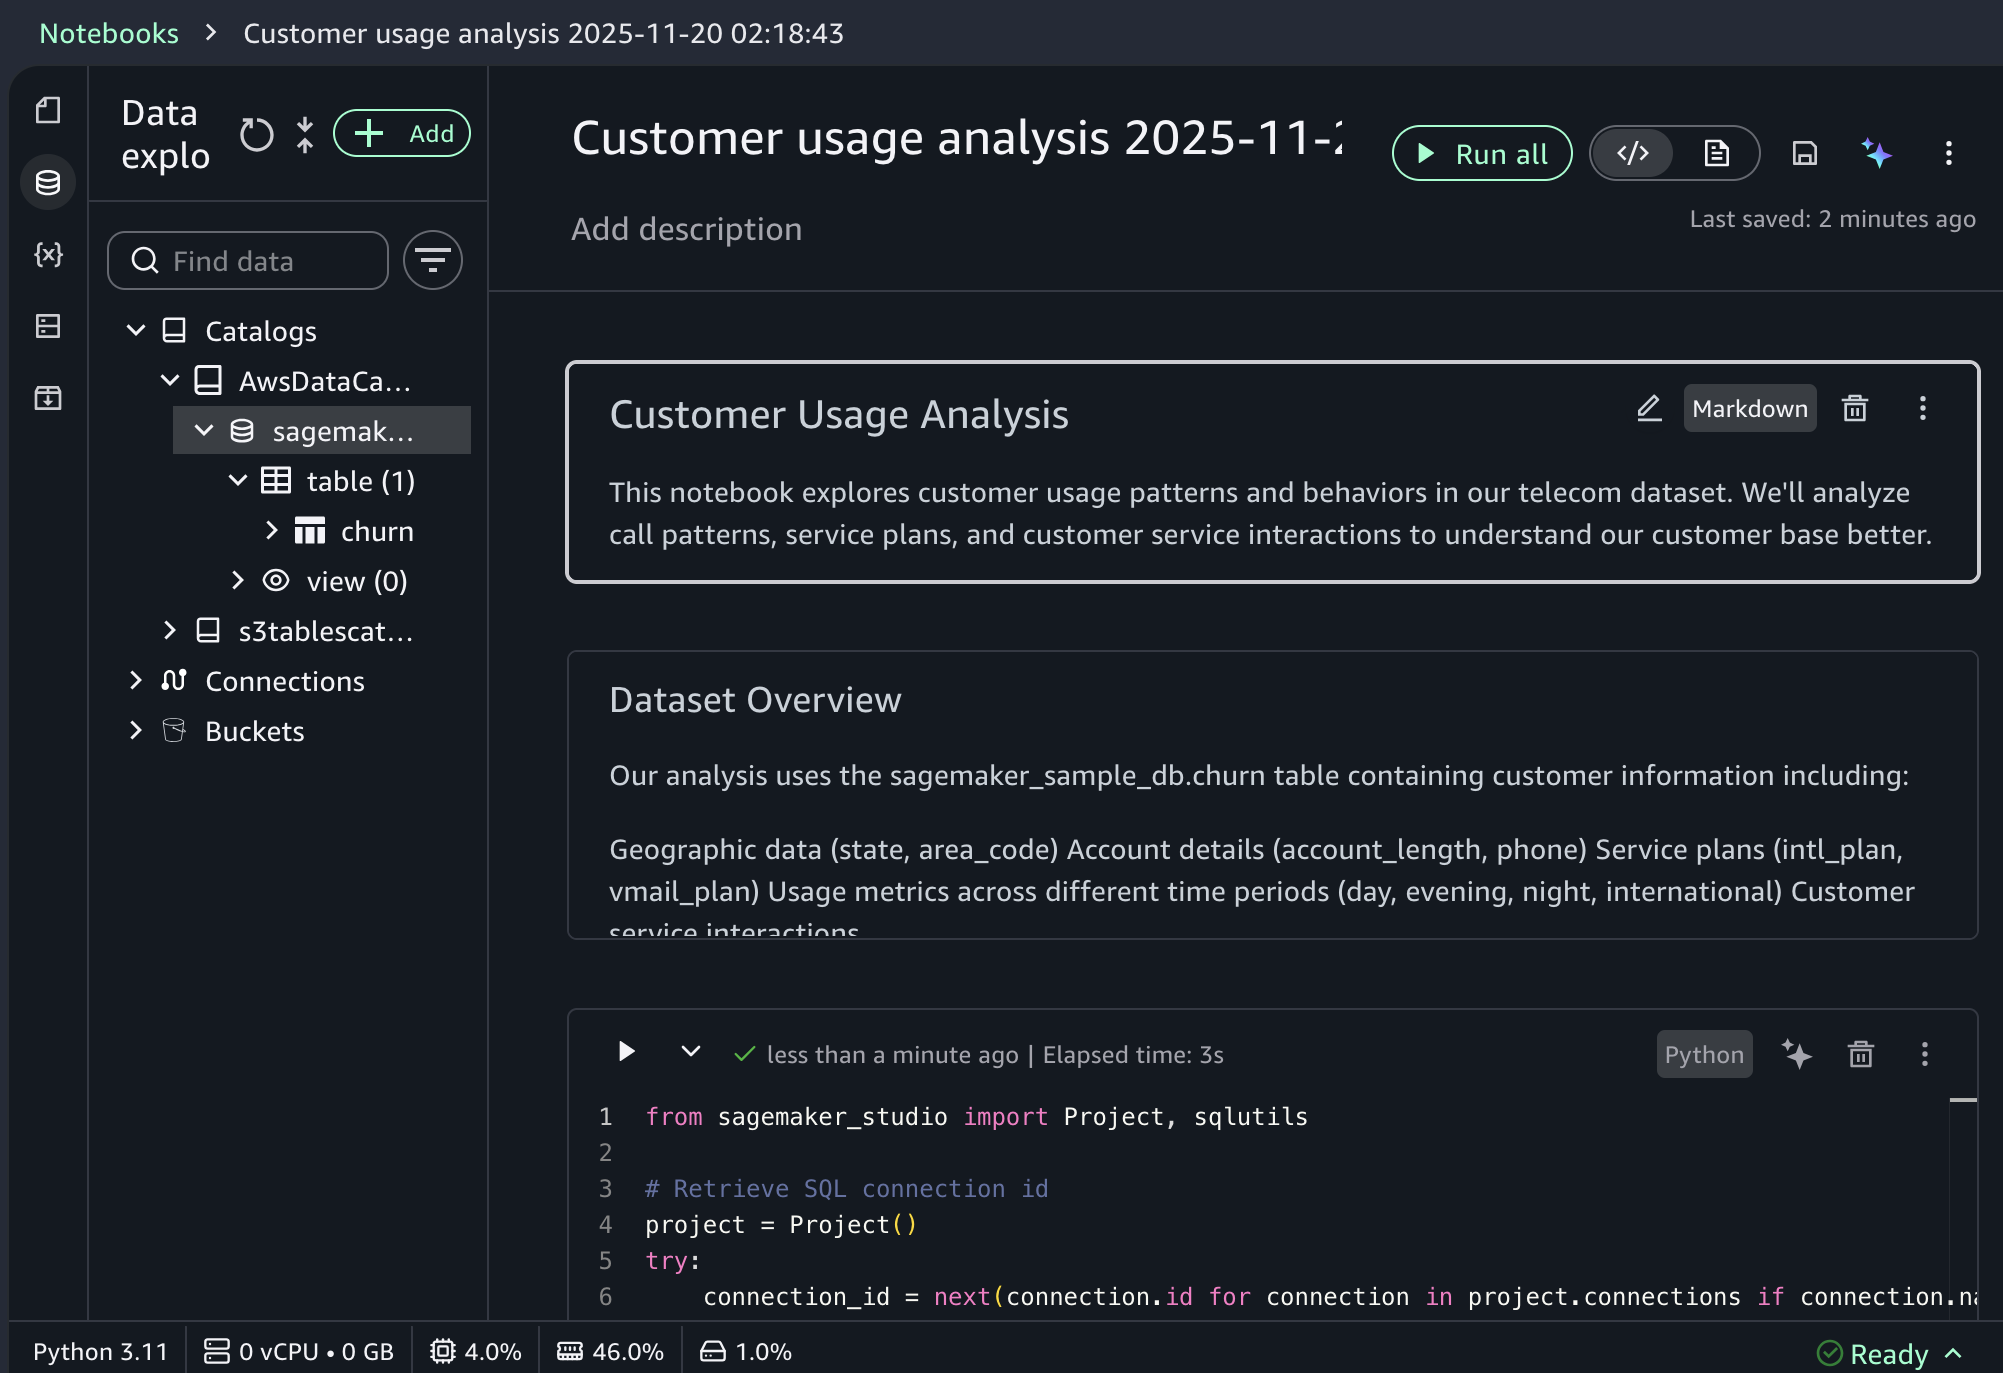
When you choose a sample project for customer usage analysis, you can open sample notebook to explore customer usage patterns and behaviors in a telecom dataset.
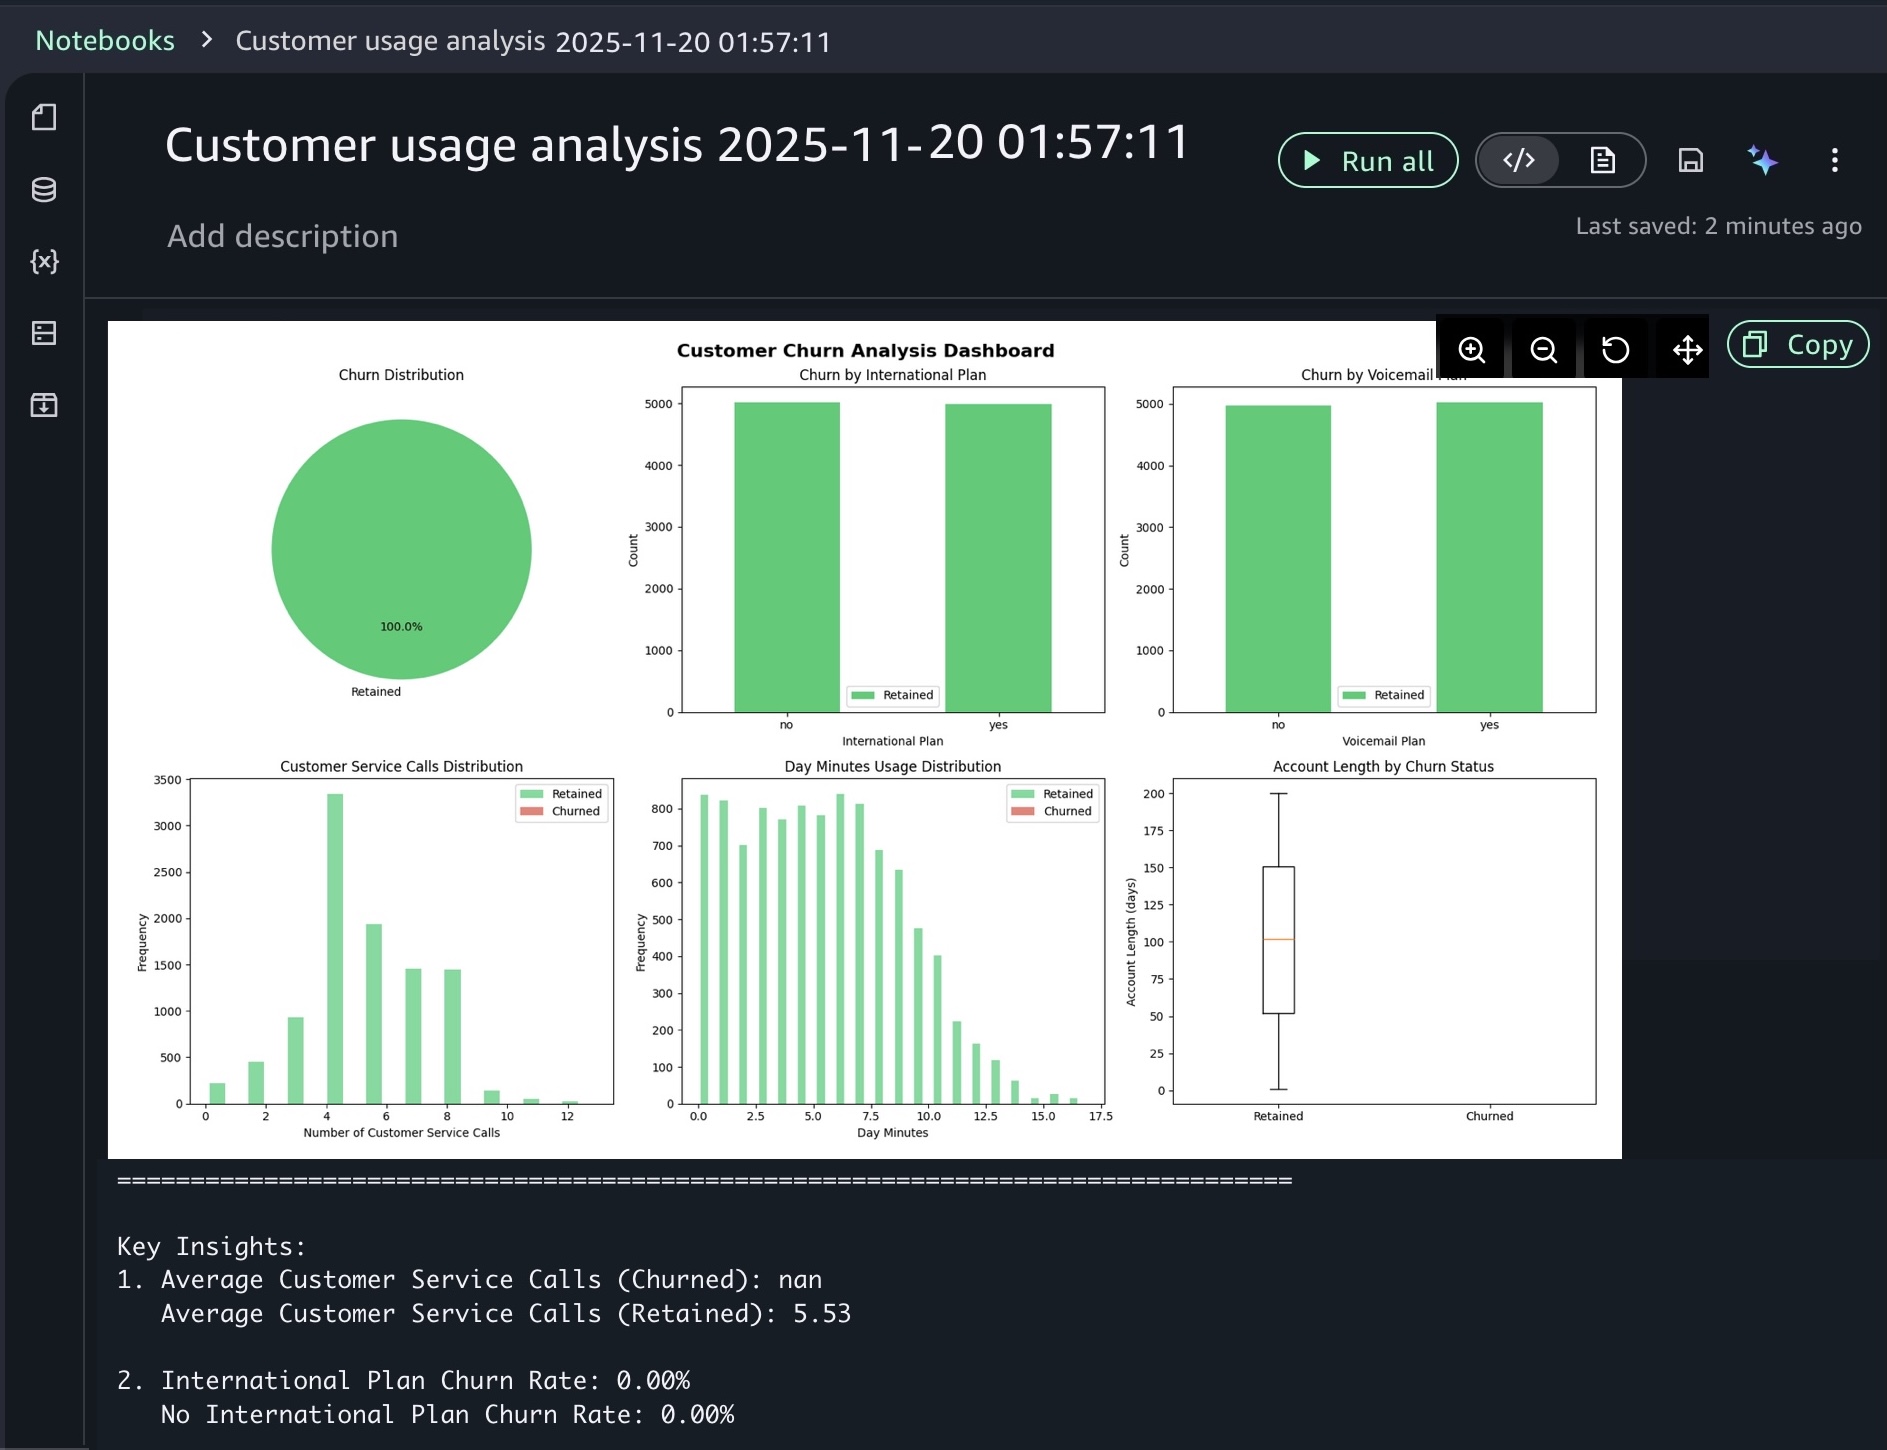
As I noted, the notebook includes a built-in AI agent that helps you interact with your data through natural language prompts. For example, you can start with data discovery using prompts like:
Show me some insights and visualizations on the customer churn dataset.
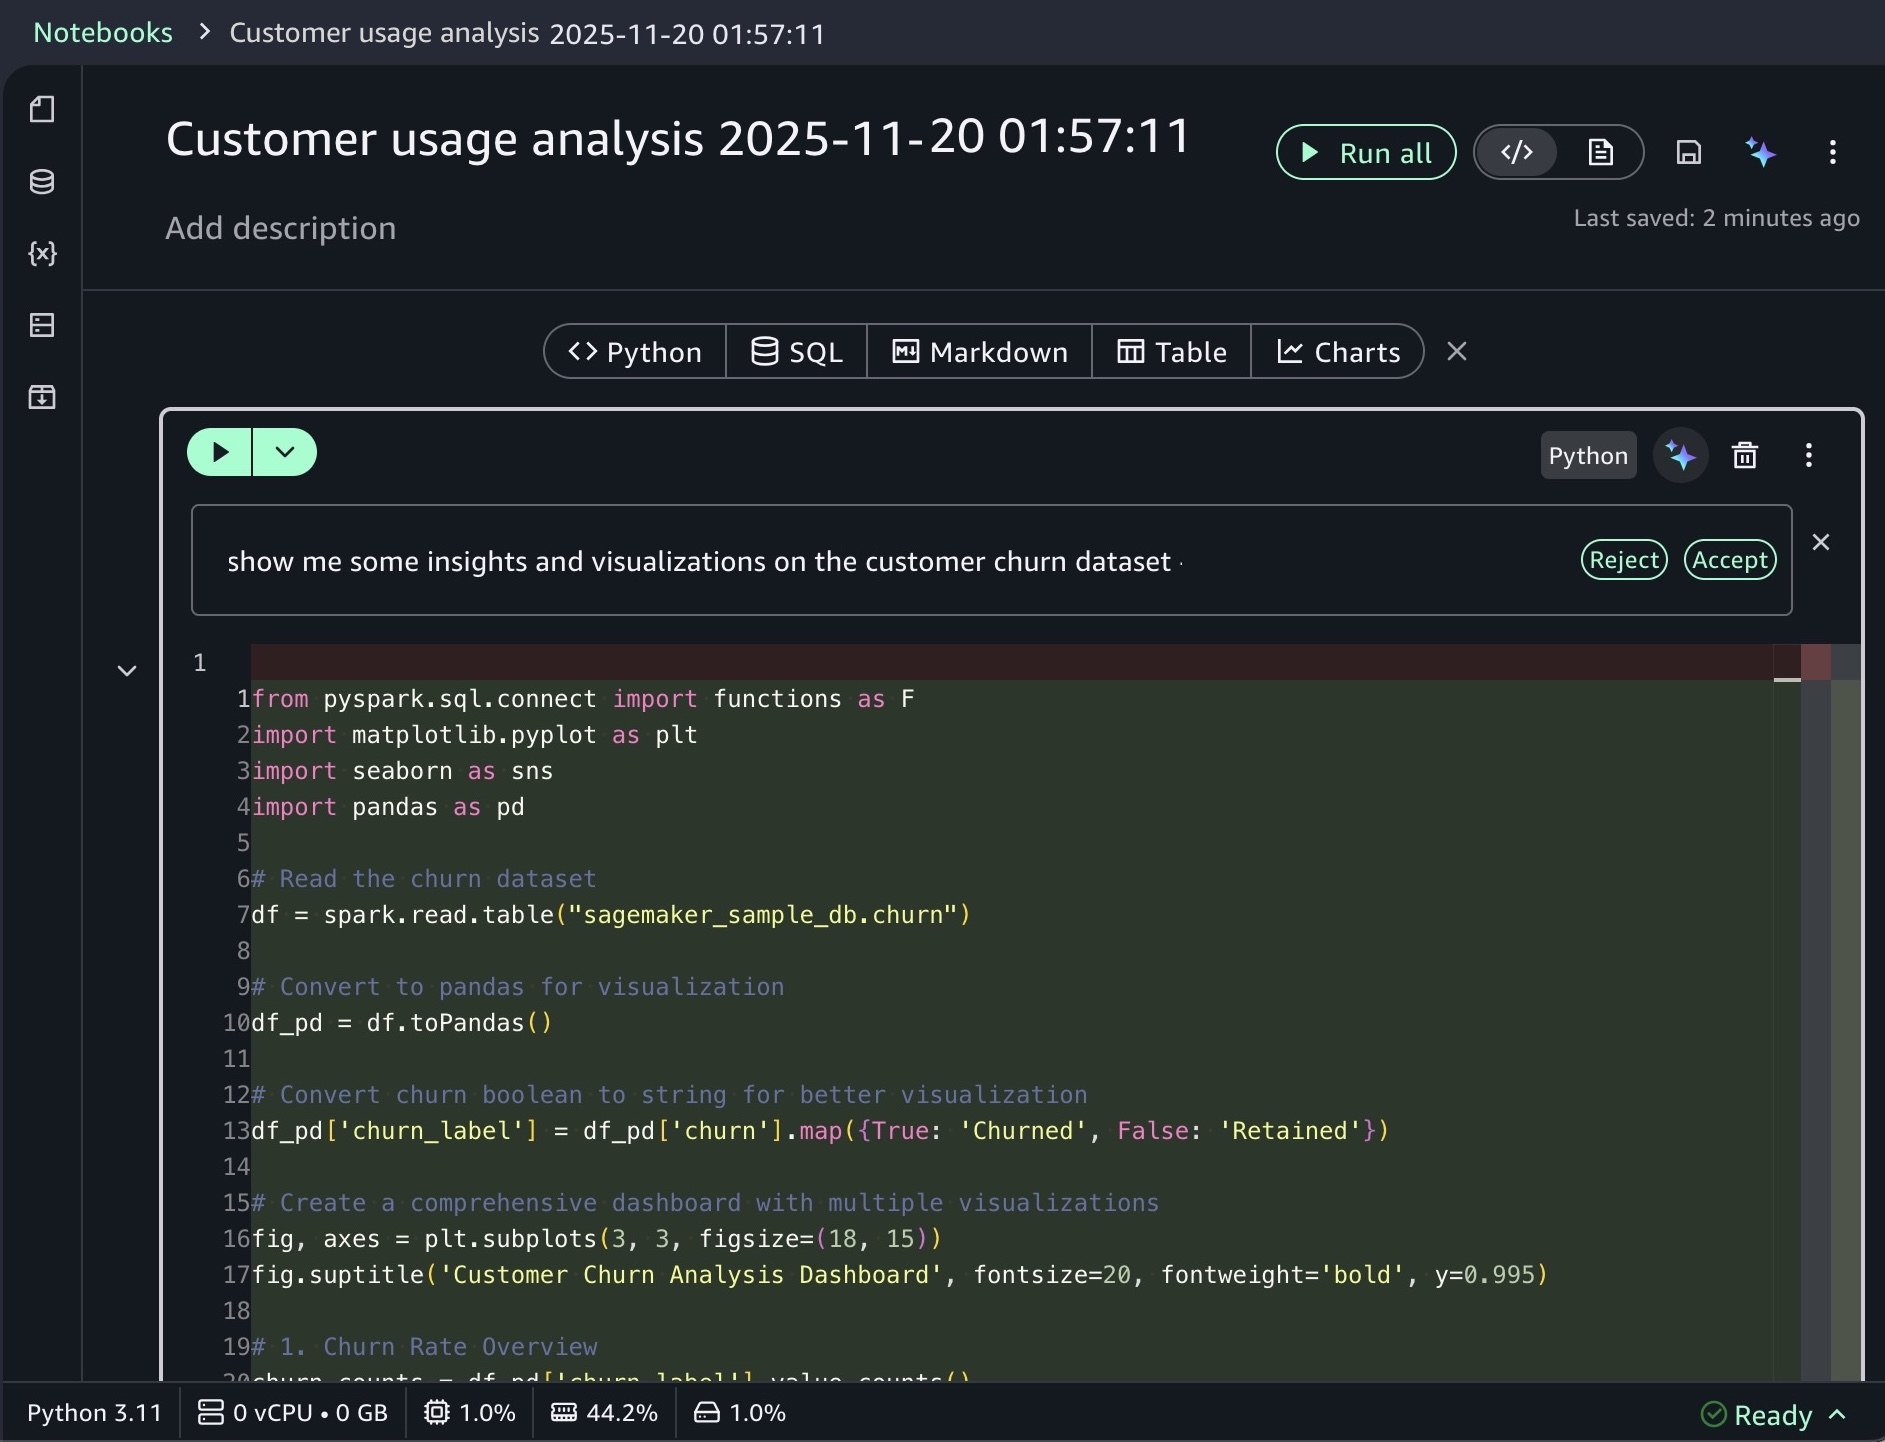
After you identify relevant tables, you can request specific analysis to generate Spark SQL. The AI agent creates step-by-step plans with initial code for data transformations and Python code for visualizations. If you see an error message while running the generated code, choose Fix with AI to get help resolving it. Here is a sample result:
For ML workflows, use specific prompts like:
Build an XGBoost classification model for churn prediction using the churn table, with purchase frequency, average transaction value, and days since last purchase as features.
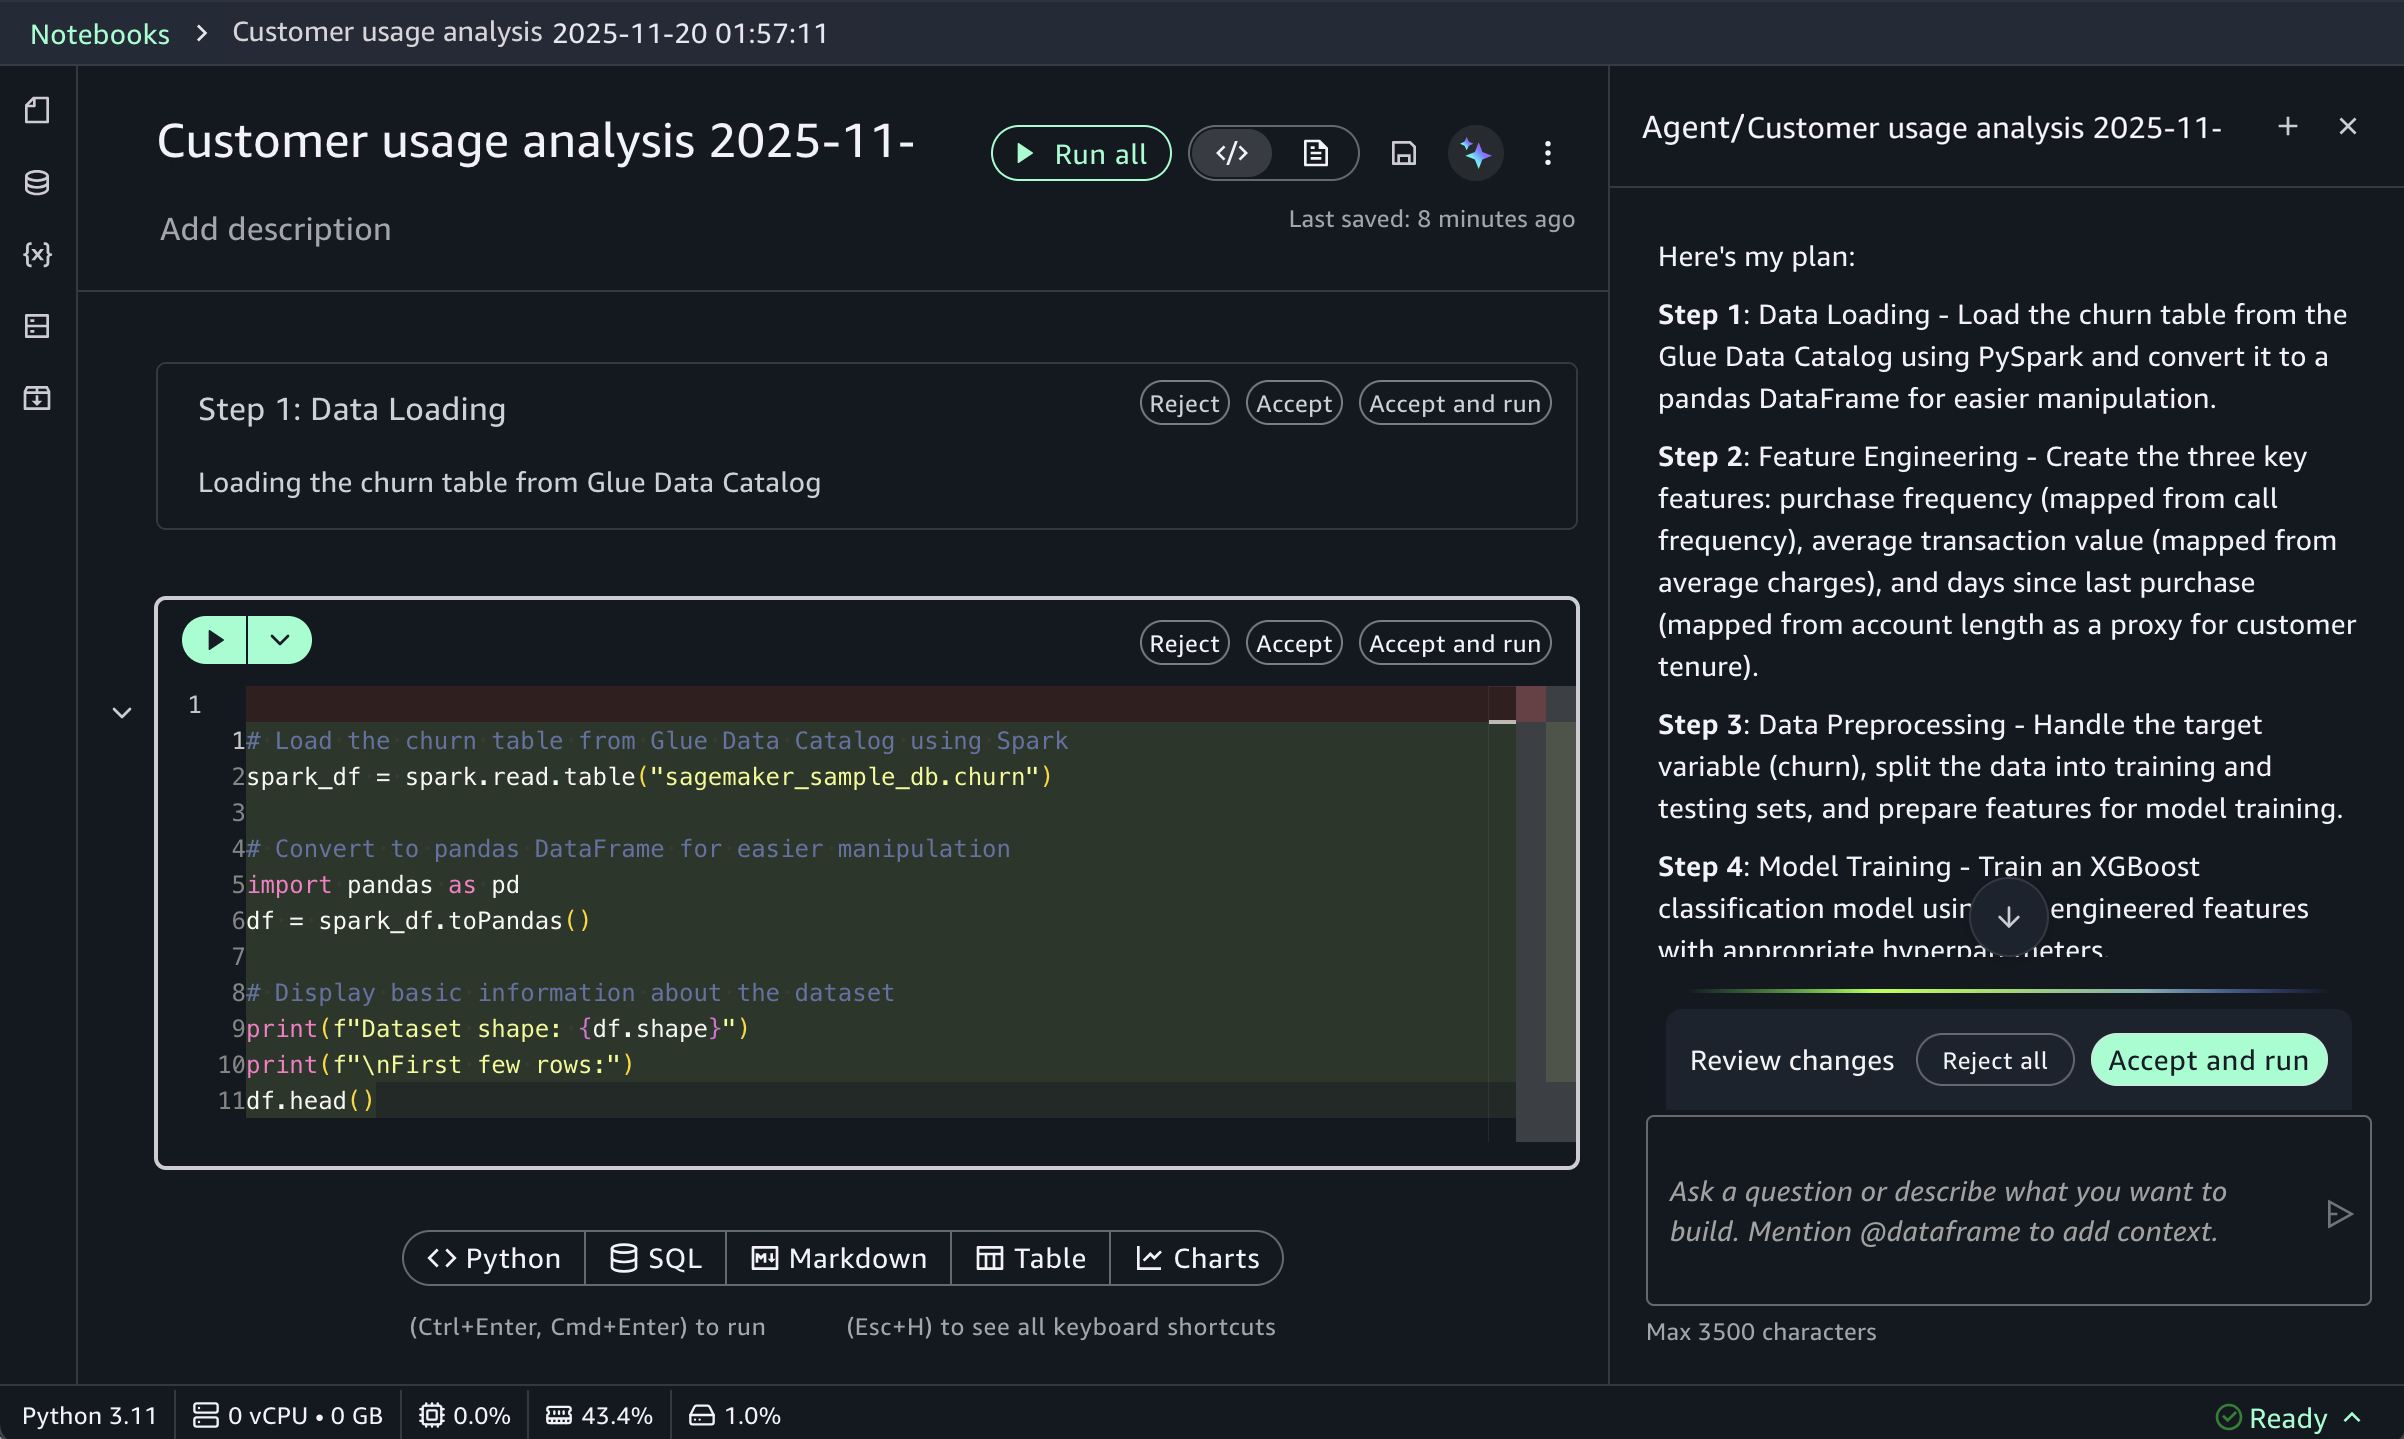
This prompt receives structured responses including a step-by-step plan, data loading, feature engineering, and model training code using the SageMaker AI capabilities, and evaluation metrics. SageMaker Data Agent works best with specific prompts and is optimized for AWS data processing services including Athena for Apache Spark and SageMaker AI.
To learn more about new notebook experience, visit the Amazon SageMaker Unified Studio User Guide.
Now available
One-click onboarding and the new notebook experience in Amazon SageMaker Unified Studio are now available in US East (Ohio), US East (N. Virginia), US West (Oregon), Asia Pacific (Mumbai), Asia Pacific (Singapore), and Asia Pacific (Sydney), Asia Pacific (Tokyo), Europe (Frankfurt), Europe (Ireland) Regions. To learn more, visit the SageMaker Unified Studio product page.
Give it a try in the SageMaker console and send feedback to AWS re:Post for SageMaker Unified Studio or through your usual AWS Support contacts.
— Channy