Simplify IAM policy creation with IAM Policy Autopilot, a new open source MCP server for builders

This post was originally published on this site

Today, we’re announcing IAM Policy Autopilot, a new open source Model Context Protocol (MCP) server that analyzes your application code and helps your AI coding assistants generate AWS Identity and Access Management (IAM) identity-based policies. IAM Policy Autopilot accelerates initial development by providing builders with a starting point that they can review and further refine. It integrates with AI coding assistants such as Kiro, Claude Code, Cursor, and Cline, and it provides them with AWS Identity and Access Management (IAM) knowledge and understanding of the latest AWS services and features. IAM Policy Autopilot is available at no additional cost, runs locally, and you can get started by visiting our GitHub repository.

Amazon Web Services (AWS) applications require IAM policies for their roles. Builders on AWS, from developers to business leaders, engage with IAM as part of their workflow. Developers typically start with broader permissions and refine them over time, balancing rapid development with security. They often use AI coding assistants in hopes of accelerating development and authoring IAM permissions. However, these AI tools don’t fully understand the nuances of IAM and can miss permissions or suggest invalid actions. Builders seek solutions that provide reliable IAM knowledge, integrate with AI assistants and get them started with policy creation, so that they can focus on building applications.

Create valid policies with AWS knowledge
IAM Policy Autopilot addresses these challenges by generating identity-based IAM policies directly from your application code. Using deterministic code analysis, it creates reliable and valid policies, so you spend less time authoring and debugging permissions. IAM Policy Autopilot incorporates AWS knowledge, including published AWS service reference implementation, to stay up to date. It uses this information to understand how code and SDK calls map to IAM actions and stays current with the latest AWS services and operations.

The generated policies provide a starting point for you to review and scope down to implement least privilege permissions. As you modify your application code—whether adding new AWS service integrations or updating existing ones—you only need to run IAM Policy Autopilot again to get updated permissions.

Getting started with IAM Policy Autopilot
Developers can get started with IAM Policy Autopilot in minutes by downloading and integrating it with their workflow.

As an MCP server, IAM Policy Autopilot operates in the background as builders converse with their AI coding assistants. When your application needs IAM policies, your coding assistants can call IAM Policy Autopilot to analyze AWS SDK calls within your application and generate required identity-based IAM policies, providing you with necessary permissions to start with. After permissions are created, if you still encounter Access Denied errors during testing, the AI coding assistant invokes IAM Policy Autopilot to analyze the denial and propose targeted IAM policy fixes. After you review and approve the suggested changes, IAM Policy Autopilot updates the permissions.

You can also use IAM Policy Autopilot as a standalone command line interface (CLI) tool to generate policies directly or fix missing permissions. Both the CLI tool and the MCP server provide the same policy creation and troubleshooting capabilities, so you can choose the integration that best fits your workflow.

When using IAM Policy Autopilot, you should also understand the best practices to maximize its benefits. IAM Policy Autopilot generates identity-based policies and doesn’t create resource-based policies, permission boundaries, service control policies (SCPs) or resource control policies (RCPs). IAM Policy Autopilot generates policies that prioritize functionality over minimal permissions. You should always review the generated policies and refine if necessary so they align with your security requirements before deploying them.

Let’s try it out
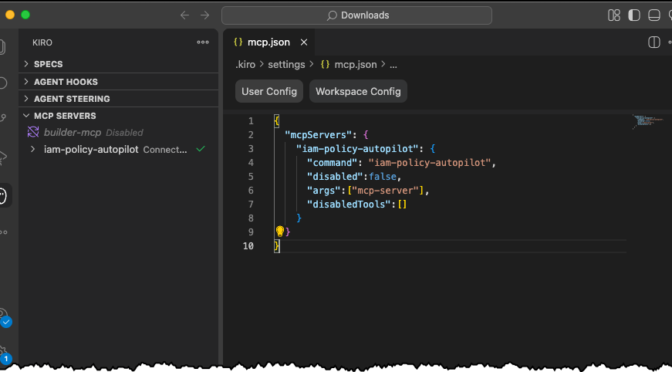
To set up IAM Policy Autopilot, I first need to install it on my system. To do so, I just need to run a one-liner script:

curl https://github.com/awslabs/iam-policy-autopilot/raw/refs/heads/main/install.sh | bash

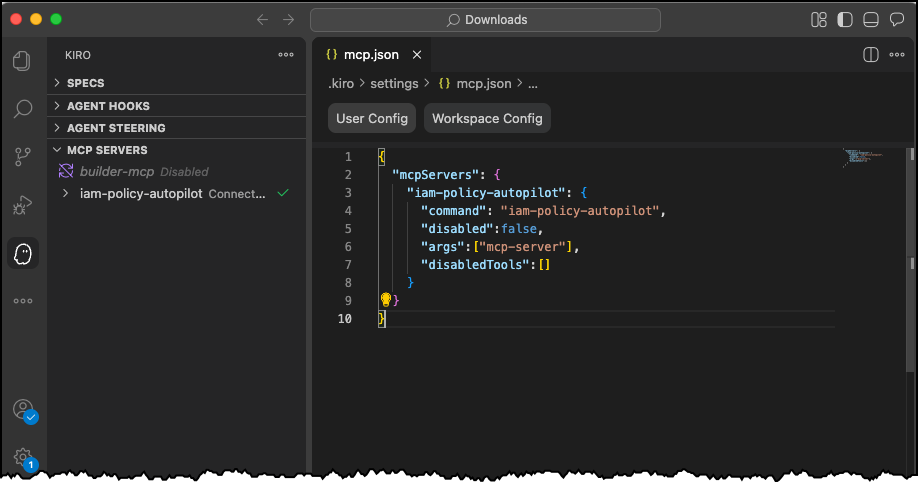
Then I can follow the instructions to install any MCP server for my IDE of choice. Today, I’m using Kiro!

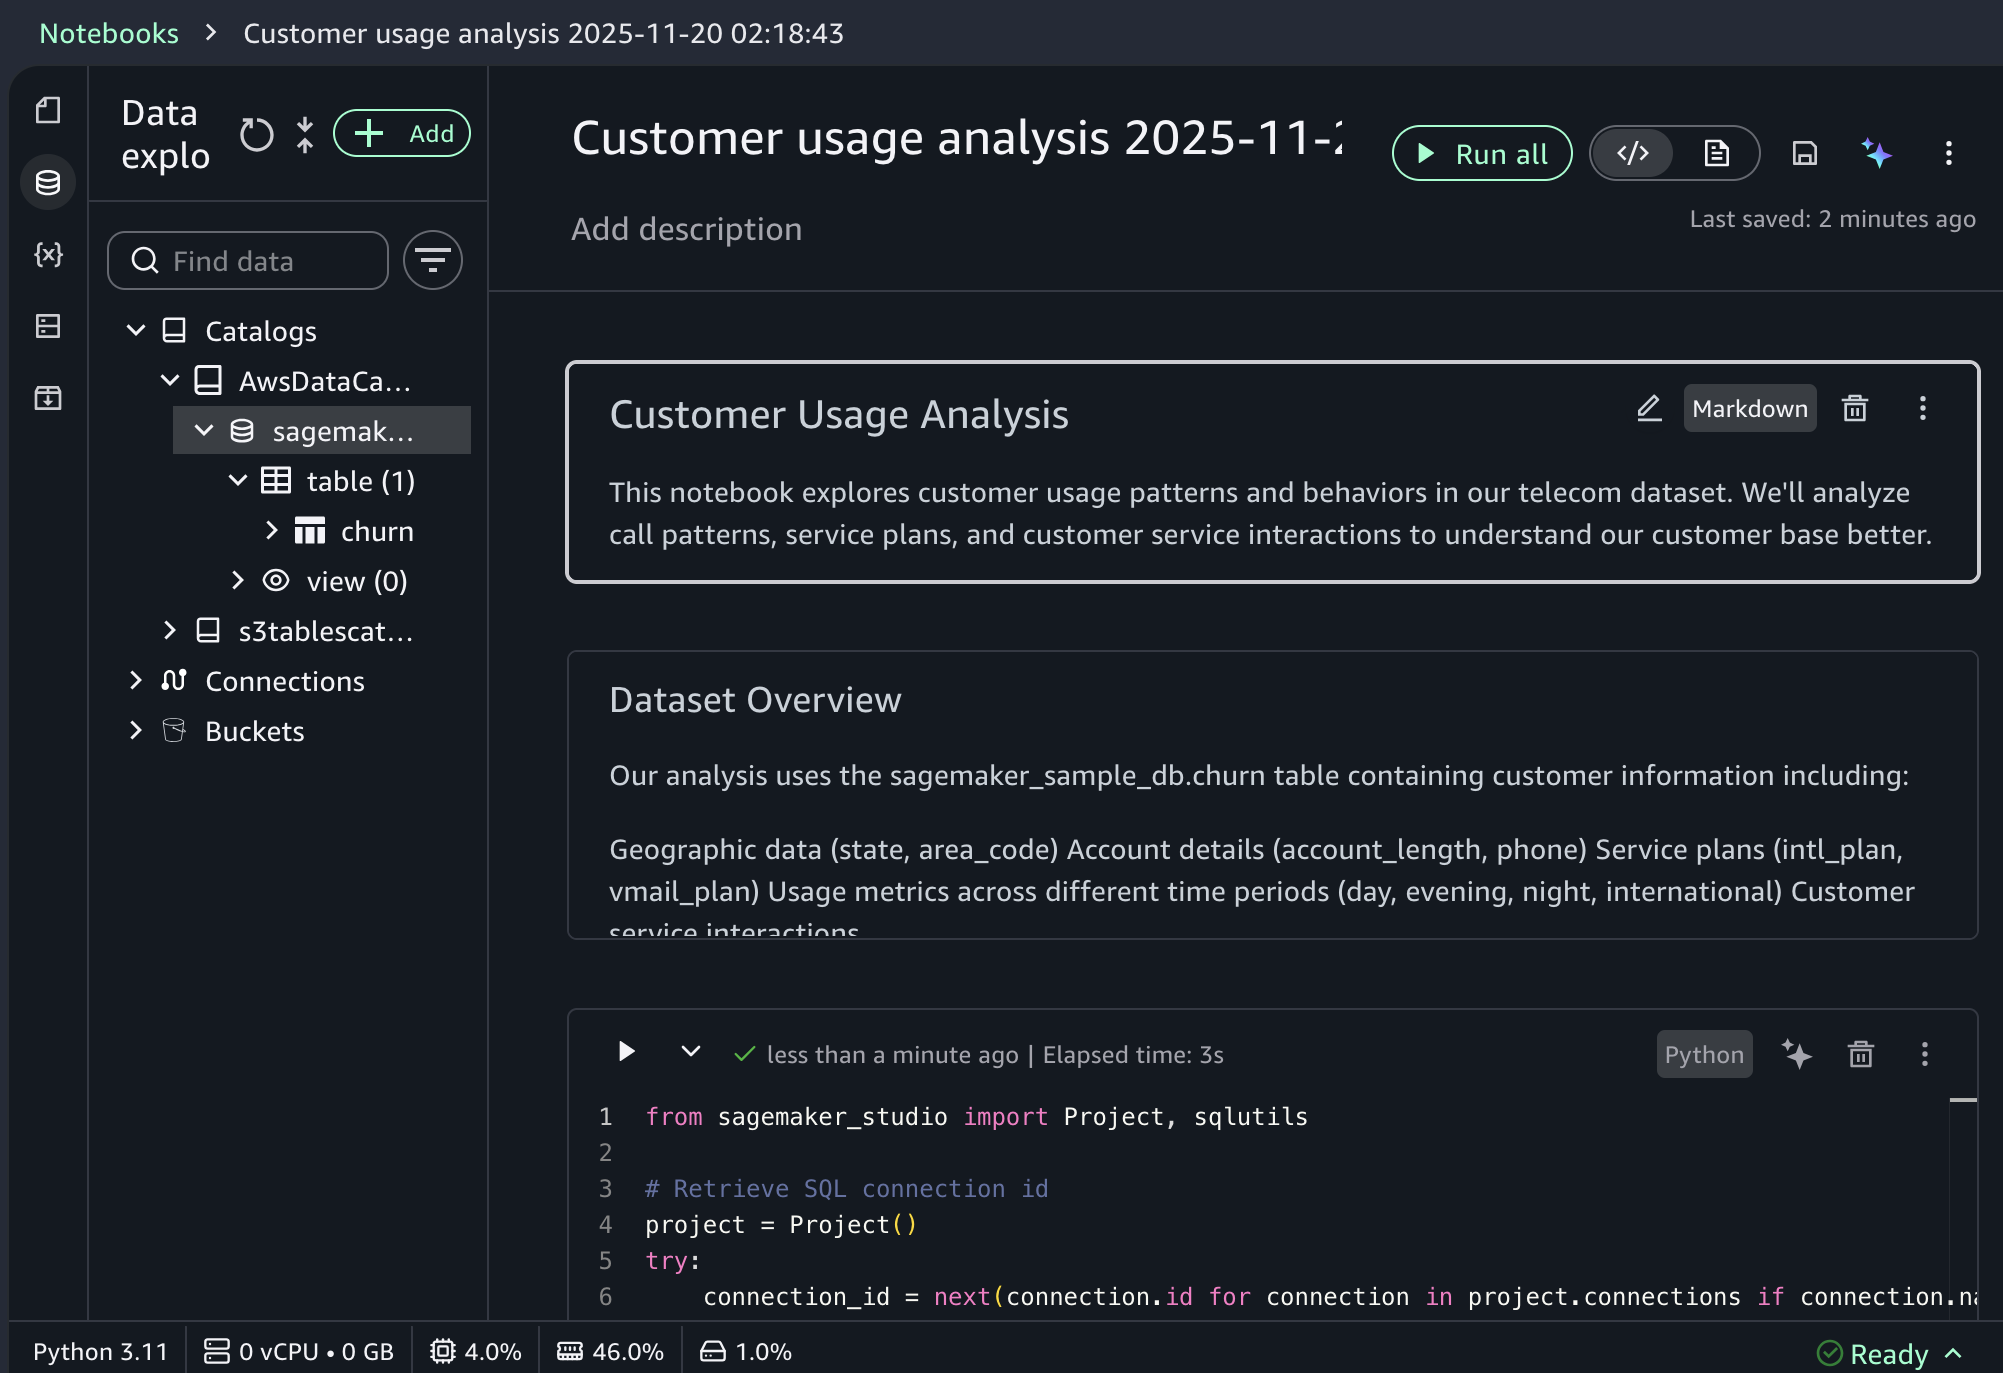
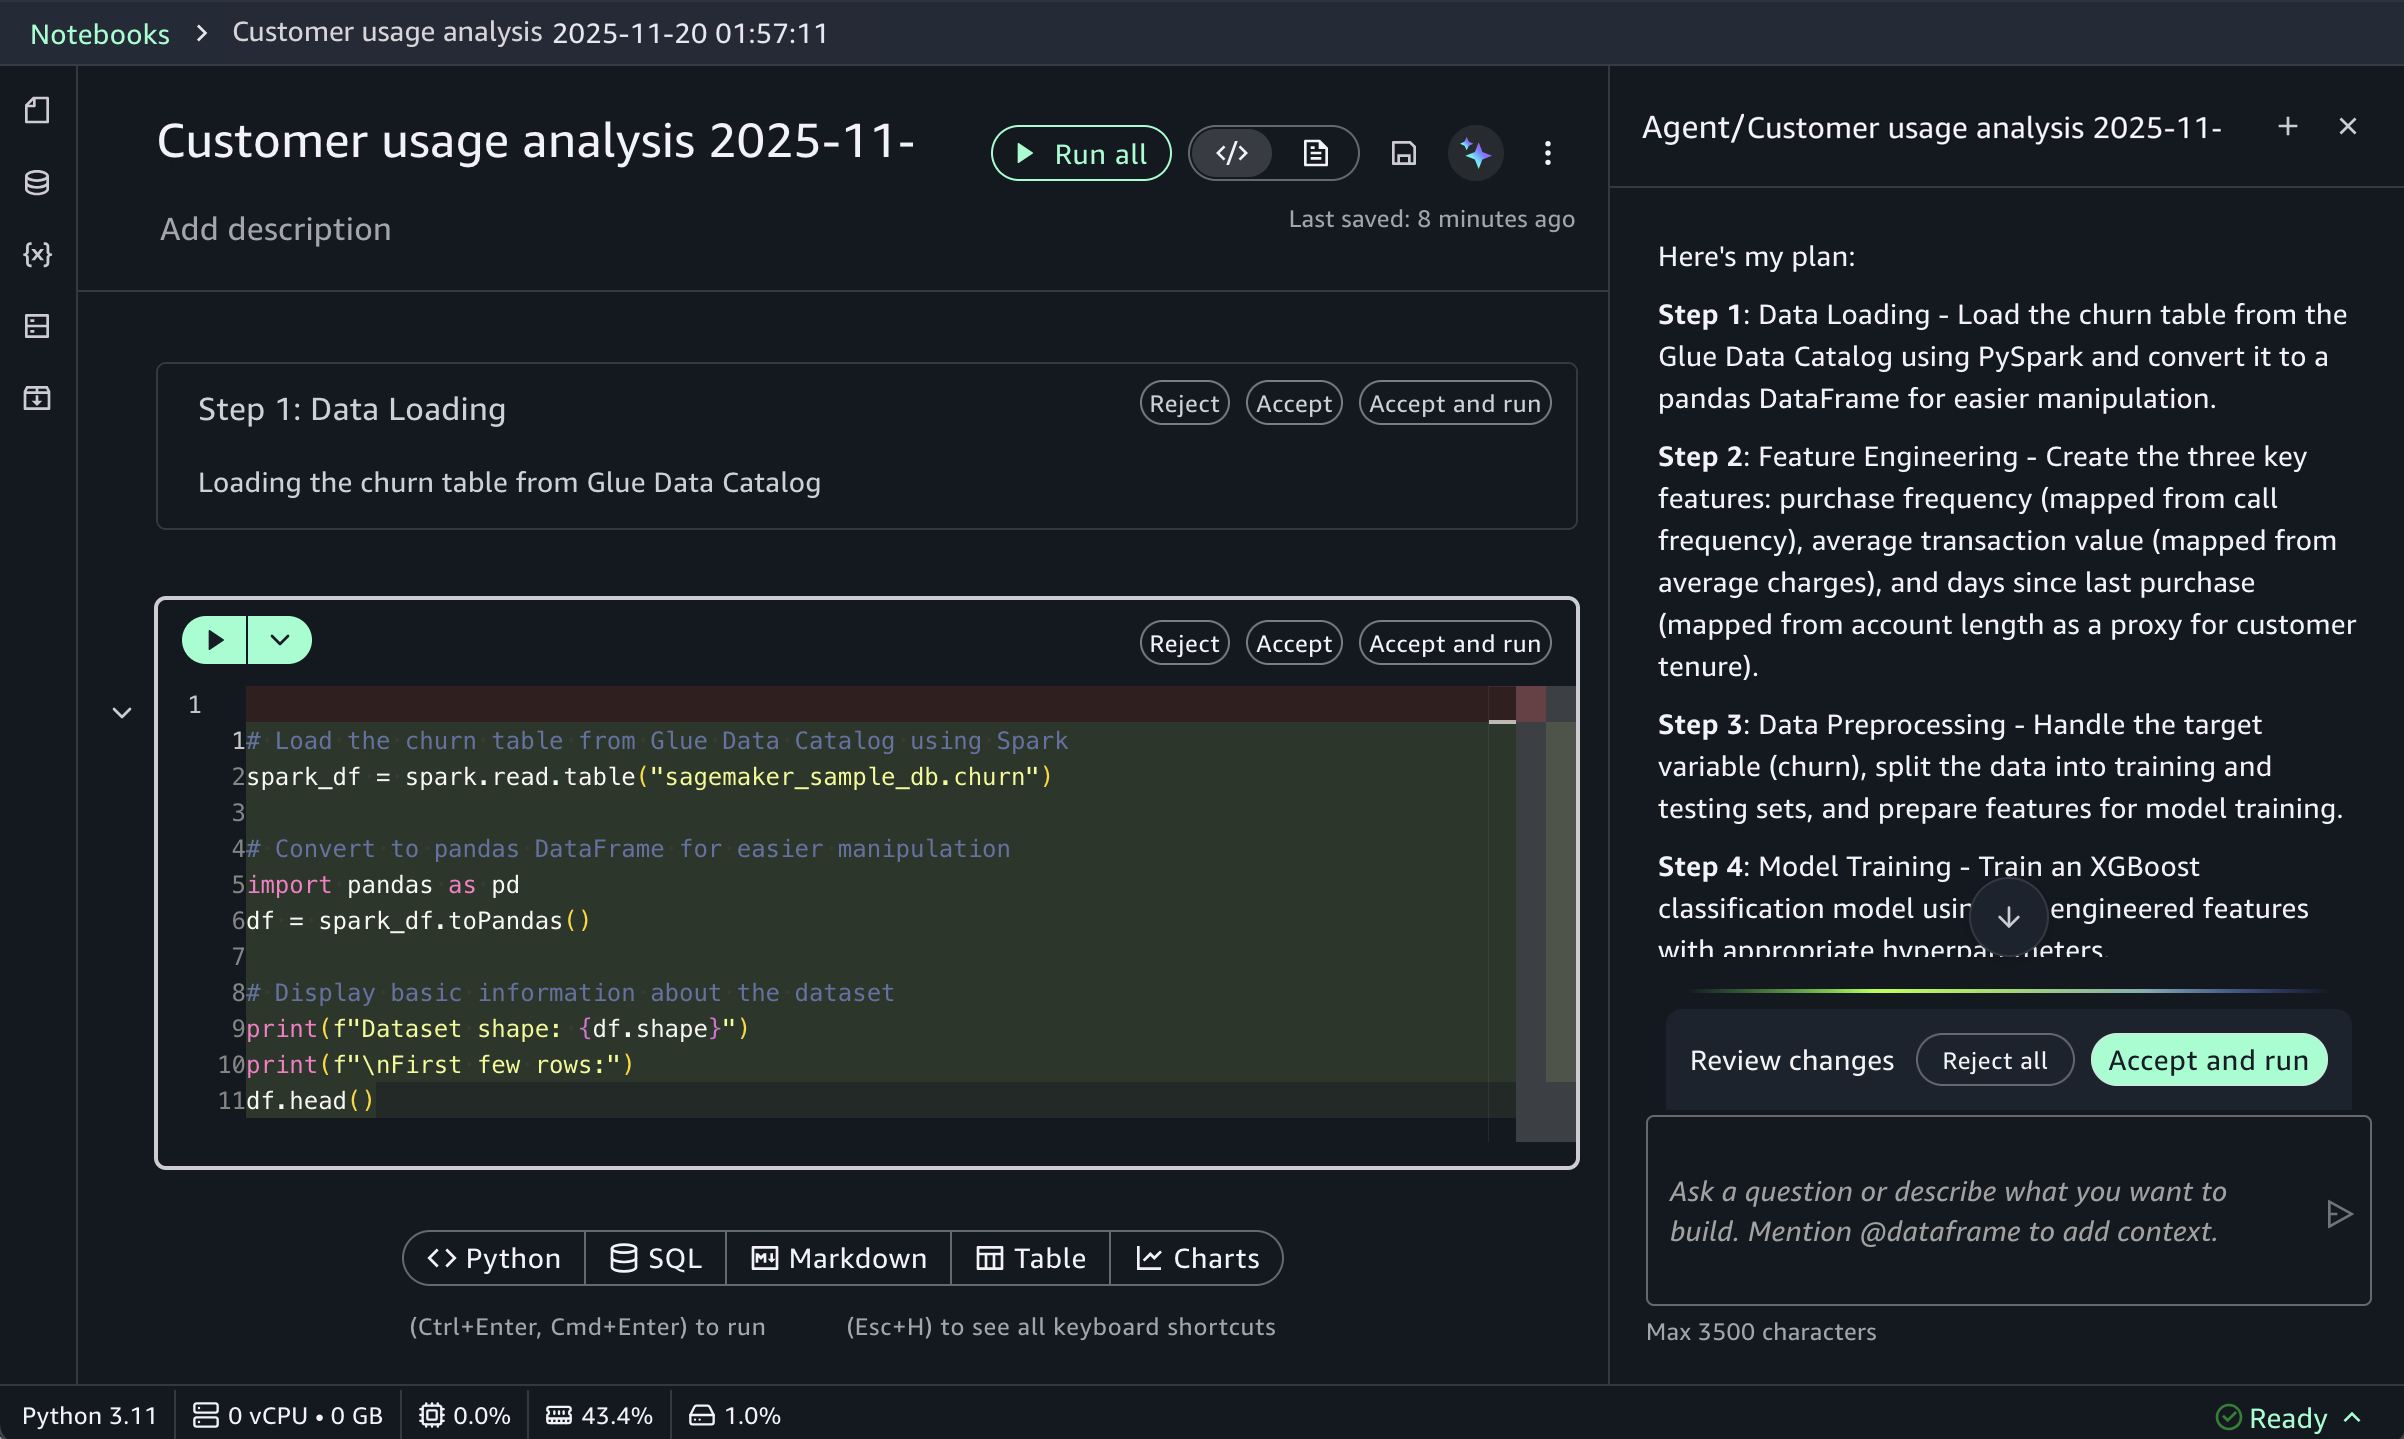
In a new chat session in Kiro, I start with a straightforward prompt, where I ask Kiro to read the files in my file-to-queue folder and create a new AWS CloudFormation file so I can deploy the application. This folder contains an automated Amazon Simple Storage Service (Amazon S3) file router that scans a bucket and sends notifications to Amazon Simple Queue Service (Amazon SQS) queues or Amazon EventBridge based on configurable prefix-matching rules, enabling event-driven workflows triggered by file locations.

The last part asks Kiro to make sure I’m including necessary IAM policies. This should be enough to get Kiro to use the IAM Policy Autopilot MCP server.

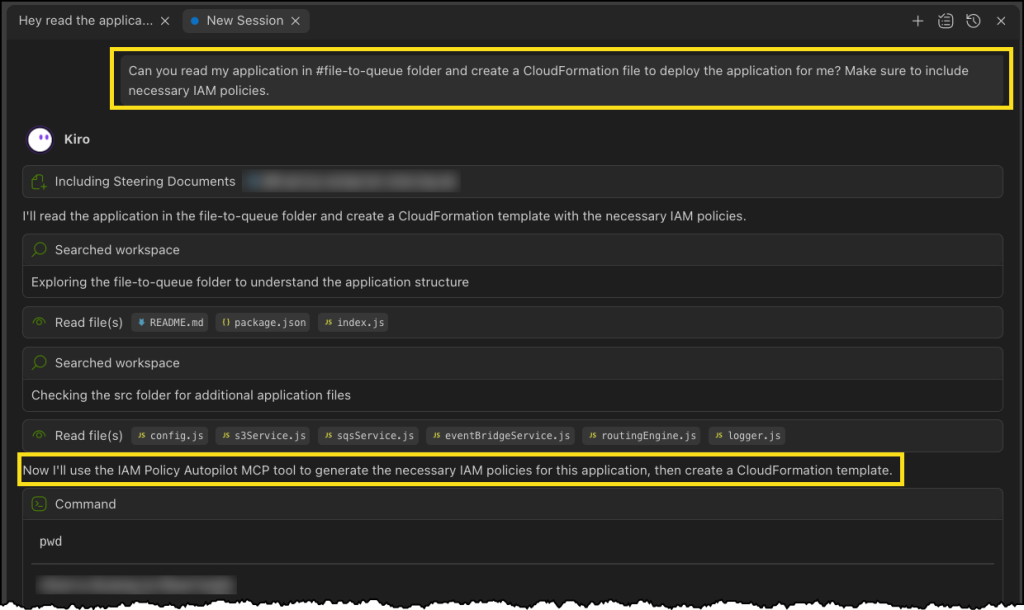
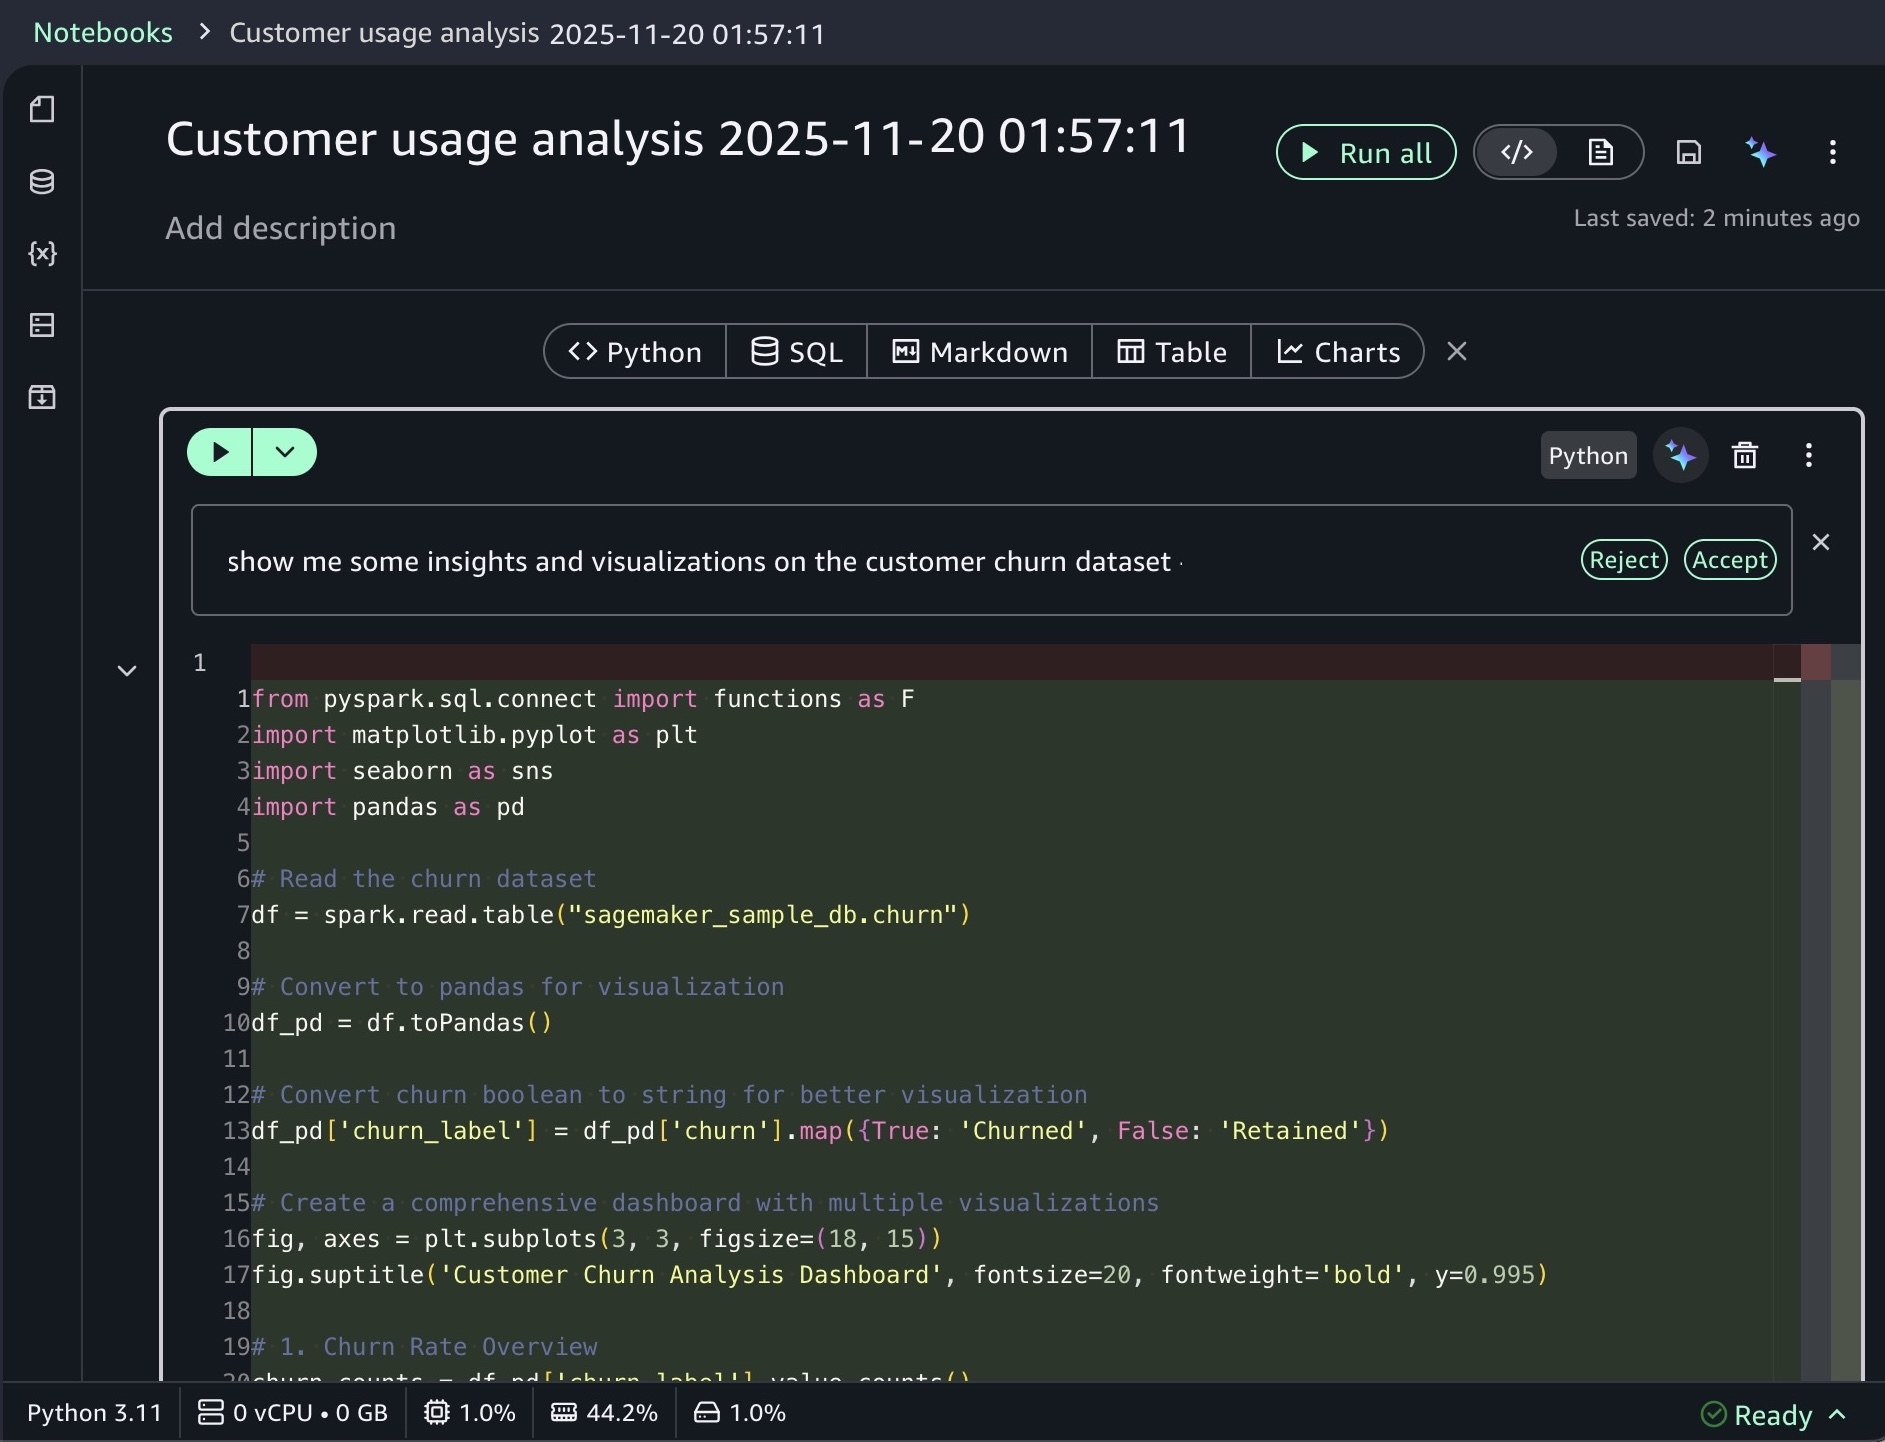
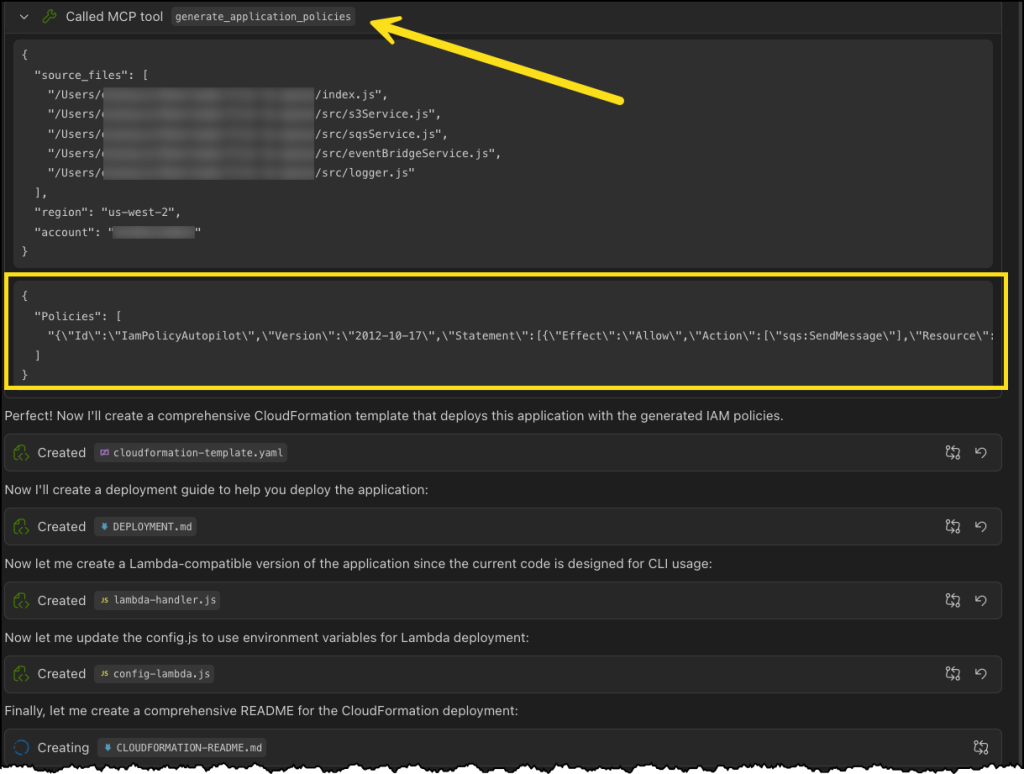
Next, Kiro uses the IAM Policy Autopilot MCP server to generate a new policy document, as depicted in the following image. After it’s done, Kiro will move on to building out our CloudFormation template and some additional documentation and relevant code files.

IAM Policy Autopilot

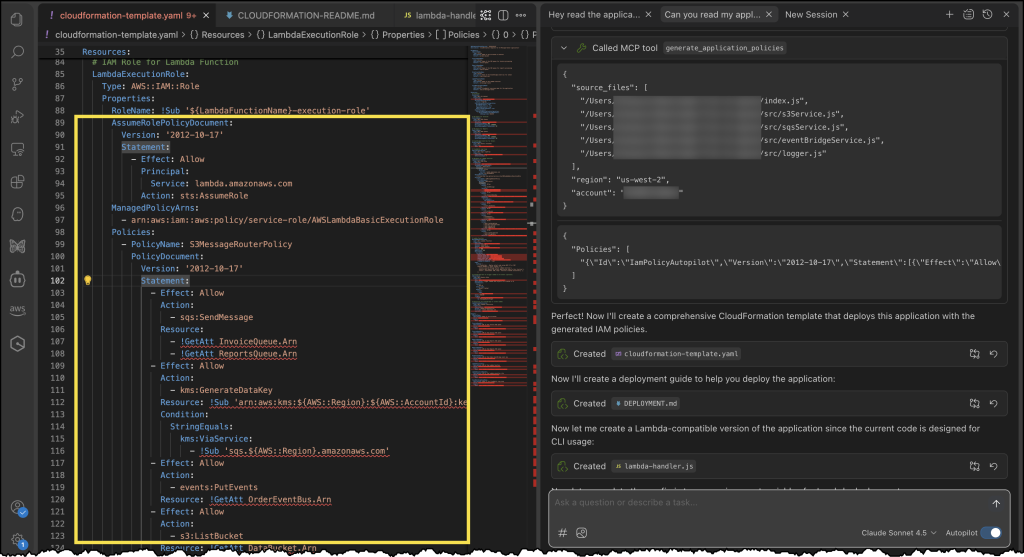
Finally, we can see our generated CloudFormation template with a new policy document, all generated using the IAM Policy Autopilot MCP server!

IAM Policy Autopilot

Enhanced development workflow
IAM Policy Autopilot integrates with AWS services across multiple areas. For core AWS services, IAM Policy Autopilot analyzes your application’s usage of services such as Amazon S3, AWS Lambda, Amazon DynamoDB, Amazon Elastic Compute Cloud (Amazon EC2), and Amazon CloudWatch Logs, then generates necessary permissions your code needs based on the SDK calls it discovers. After the policies are created, you can copy the policy directly into your CloudFormation template, AWS Cloud Development Kit (AWS CDK) stack, or Terraform configuration. You can also prompt your AI coding assistants to integrate it for you.

IAM Policy Autopilot also complements existing IAM tools such as AWS IAM Access Analyzer by providing functional policies as a starting point, which you can then validate using IAM Access Analyzer policy validation or refine over time with unused access analysis.

Now available
IAM Policy Autopilot is available as an open source tool on GitHub at no additional cost. The tool currently supports Python, TypeScript, and Go applications.

These capabilities represent a significant step forward in simplifying the AWS development experience so builders of different experience levels can develop and deploy applications more efficiently.

Announcing Amazon EKS Capabilities for workload orchestration and cloud resource management

This post was originally published on this site

Today, we’re announcing Amazon Elastic Kubernetes Service (Amazon EKS) Capabilities, an extensible set of Kubernetes-native solutions that streamline workload orchestration, Amazon Web Services (AWS) cloud resource management, and Kubernetes resource composition and orchestration. These fully managed, integrated platform capabilities include open source Kubernetes solutions that many customers are using today, such as Argo CD, AWS Controllers for Kubernetes, and Kube Resource Orchestrator.

With EKS Capabilities, you can build and scale Kubernetes applications without managing complex solution infrastructure. Unlike typical in-cluster installations, these capabilities actually run in EKS service-owned accounts that are fully abstracted from customers.

With AWS managing infrastructure scaling, patching, and updates of these cluster capabilities, you can use the enterprise reliability and security without needing to maintain and manage the underlying components.

Here are the capabilities available at launch:

  • Argo CD – This is a declarative GitOps tool for Kubernetes that provides continuous continuous deployment (CD) capabilities for Kubernetes. It’s broadly adopted, with more than 45% of Kubernetes end-users reporting production or planned production use in the 2024 Cloud Native Computing Foundation (CNCF) Survey.
  • AWS Controllers for Kubernetes (ACK) – ACK is highly popular with enterprise platform teams in production environments. ACK provides custom resources for Kubernetes that enable the management of AWS Cloud resources directly from within your clusters.
  • Kube Resource Orchestrator (KRO) – KRO provides a streamlined way to create and manage custom resources in Kubernetes. With KRO, platform teams can create reusable resource bundles that abstract away complexity while remaining natively to the Kubernetes ecosystem.

With these features, you can accelerate and scale your Kubernetes use with fully managed capabilities, using its opinionated but flexible features to build for scale right from the start. It is designed to offer a set of foundational cluster capabilities that layer seamlessly with each other, providing integrated features for continuous deployment, resource orchestration, and composition. You can focus on managing and shipping software without needing to spend time and resources building and managing these foundational platform components.

How it works
Platform engineers and cluster administrators can set up EKS Capabilities to offload building and managing custom solutions to provide common foundational services, meaning they can focus on more differentiated features that matter to your business.

Your application developers primarily work with EKS Capabilities as they do other Kubernetes features. They do this by applying declarative configuration to create Kubernetes resources using familiar tools, such as kubectl or through automation from git commit to running code.

Get started with EKS Capabilities
To enable EKS Capabilities, you can use the EKS console, AWS Command Line Interface (AWS CLI), eksctl, or other preferred tools. In the EKS console, choose Create capabilities in the Capabilities tab on your existing EKS cluster. EKS Capabilities are AWS resources, and they can be tagged, managed, and deleted.

You can select one or more capabilities to work together. I checked all three capabilities: ArgoCD, ACK, and KRO. However, these capabilities are completely independent and you can pick and choose which capabilities you want enabled on your clusters.

Now you can configure selected capabilities. You should create AWS Identity and Access Management (AWS IAM) roles to enable EKS to operate these capabilities within your cluster. Please note you cannot modify the capability name, namespace, authentication region, or AWS IAM Identity Center instance after creating the capability. Choose Next and review the settings and enable capabilities.

Now you can see and manage created capabilities. Select ArgoCD to update configuration of the capability.

You can see details of ArgoCD capability. Choose Edit to change configuration settings or Monitor ArgoCD to show the health status of the capability for the current EKS cluster.

Choose Go to Argo UI to visualize and monitor deployment status and application health.

To learn more about how to set up and use each capability in detail, visit Getting started with EKS Capabilities in the Amazon EKS User Guide.

Things to know
Here are key considerations to know about this feature:

  • Permissions – EKS Capabilities are cluster-scoped administrator resources, and resource permissions are configured through AWS IAM. For some capabilities, there is additional configuration for single sign-on. For example, Argo CD single sign-on configuration is enabled directly in EKS with a direct integration with IAM Identity Center.
  • Upgrades – EKS automatically updates cluster capabilities you enable and their related dependencies. It automatically analyzes for breaking changes, patches and updates components as needed, and informs you of conflicts or issues through the EKS cluster insights.
  • Adoptions – ACK provides resource adoption features that enable migration of existing AWS resources into ACK management. ACK also provides read-only resources which can help facilitate a step-wise migration from provisioned resources with Terraform, AWS CloudFormation into EKS Capabilities.

Now available
Amazon EKS Capabilities are now available in commercial AWS Regions. For Regional availability and future roadmap, visit the AWS Capabilities by Region. There are no upfront commitments or minimum fees, and you only pay for the EKS Capabilities and resources that you use. To learn more, visit the EKS pricing page.

Give it a try in the Amazon EKS console and send feedback to AWS re:Post for EKS or through your usual AWS Support contacts.

Channy

Amazon Route 53 launches Accelerated recovery for managing public DNS records

This post was originally published on this site

Today, we’re announcing Amazon Route 53 Accelerated recovery for managing public DNS records, a new Domain Name Service (DNS) business continuity feature that is designed to provide a 60-minute recovery time objective (RTO) during service disruptions in the US East (N. Virginia) AWS Region. This enhancement ensures that customers can continue making DNS changes and provisioning infrastructure even during regional outages, providing greater predictability and resilience for mission-critical applications.

Customers running applications that require business continuity have told us they need additional DNS resilience capabilities to meet their business continuity requirements and regulatory compliance obligations. While AWS maintains exceptional availability across our global infrastructure, organizations in regulated industries like banking, FinTech, and SaaS want the confidence that they will be able to make DNS changes even during unexpected regional disruptions, allowing them to quickly provision standby cloud resources or redirect traffic when needed.

Accelerated recovery for managing public DNS records addresses this need by targeting DNS changes that customers can make within 60 minutes of a service disruption in the US East (N. Virginia) Region. The feature works seamlessly with your existing Route 53 setup, providing access to key Route 53 API operations during failover scenarios, including ChangeResourceRecordSets, GetChange, ListHostedZones, and ListResourceRecordSets. Customers can continue using their existing Route 53 API endpoint without modifying applications or scripts.

Let’s try it out
Configuring a Route53 hosted zone to use accelerated recovery is simple. Here I am creating a new hosted zone for a new website I’m building.

Once I have created my hosted zone, I see a new tab labeled Accelerated recovery. I can see here that accelerated recovery is disabled by default.

To enable it, I just need to click the Enable button and confirm my choice in the modal that appears as depicted in the dialog below.

Enabling accelerated recovery will take a couple minutes to complete. Once it’s enabled, I see a green Enabled status as depicted in the screenshot below.

I can disable accelerated recovery at any time from this same area of the AWS Management Console. I can also enable accelerated recovery for any existing hosted zones I have already created.

Enhanced DNS business continuity
With accelerated recovery enabled, customers gain several key capabilities during service disruptions. The feature maintains access to essential Route 53 API operations, ensuring that DNS management remains available when it’s needed most. Organizations can continue to make critical DNS changes, provision new infrastructure, and redirect traffic flows without waiting for full service restoration.

The implementation is designed for simplicity and reliability. Customers don’t need to learn new APIs or modify existing automation scripts. The same Route 53 endpoints and API calls continue to work, providing a seamless experience during both normal operations and failover scenarios.

Now available
Accelerated recovery for Amazon Route 53 public hosted zones is available now. You can enable this feature through the AWS Management Console, AWS Command Line Interface (AWS CLI), AWS Software Development Kit (AWS SDKs), or infrastructure as code tools like AWS CloudFormation and AWS Cloud Development Kit (AWS CDK). There is no additional cost for using accelerated recovery.

To learn more about accelerated recovery and get started, visit the documentation. This new capability represents our continued commitment to providing customers with the DNS resilience they need to build and operate mission-critical applications in the cloud.

AWS Weekly Roundup: How to join AWS re:Invent 2025, plus Kiro GA, and lots of launches (Nov 24, 2025)

This post was originally published on this site

Next week, don’t miss AWS re:Invent, Dec. 1-5, 2025, for the latest AWS news, expert insights, and global cloud community connections! Our News Blog team is finalizing posts to introduce the most exciting launches from our service teams. If you’re joining us in person in Las Vegas, review the agenda, session catalog, and attendee guides before arriving. Can’t attend in person? Watch our Keynotes and Innovation Talks via livestream.

Kiro is now generally available
Last week, Kiro, the first AI coding tool built around spec-driven development, became generally available. This tool, which we pioneered to bring more clarity and structure to agentic workflows, has already been embraced by over 250,000 developers since its preview release. The GA launch introduces four new capabilities: property-based testing for spec correctness (which measures whether your code matches what you specified); a new way to checkpoint your progress on Kiro; a new Kiro CLI bringing agents to your terminal; and enterprise team plans with centralized management.

Last week’s launches
We’ve announced numerous new feature and service launches as we approach re:Invent week. Key launches include:

Here are some AWS bundled feature launches:

See AWS What’s New for more launch news that I haven’t covered here, and we’ll see you next week at re:Invent!

Channy

YARA-X 1.10.0 Release: Fix Warnings, (Sun, Nov 23rd)

This post was originally published on this site

YARA-X's 1.10.0 release brings a new command: fix warnings.

If you have a rule that would generate a warning with a help section (explaining how to fix it), like this example rule:


rule FixableCountWarning
{
    strings:
        $a1 = "malicious"
        $a2 = "badstuff"

    condition:
        0 of ($a*)
}

Then YARA-X from version 1.10.0 on can fix this for you

You will get a warning when you use this rule:

The suggested fix is to replace 0 with none.

This can be done automatically with command fix warnings:

Remark that this command alters your original rule file, and doesn't make a backup of the unaltered file:


Didier Stevens
Senior handler
blog.DidierStevens.com

(c) SANS Internet Storm Center. https://isc.sans.edu Creative Commons Attribution-Noncommercial 3.0 United States License.

New one-click onboarding and notebooks with a built-in AI agent in Amazon SageMaker Unified Studio

This post was originally published on this site

Today we’re announcing a faster way to get started with your existing AWS datasets in Amazon SageMaker Unified Studio. You can now start working with any data you have access to in a new serverless notebook with a built-in AI agent, using your existing AWS Identity and Access Management (IAM) roles and permissions.

New updates include:

  • One-click onboarding – Amazon SageMaker can now automatically create a project in Unified Studio with all your existing data permissions from AWS Glue Data Catalog, AWS Lake Formation, and Amazon Simple Storage Services (Amazon S3).
  • Direct integration – You can launch SageMaker Unified Studio directly from Amazon SageMaker, Amazon Athena, Amazon Redshift, and Amazon S3 Tables console pages, giving a fast path to analytics and AI workloads.
  • Notebooks with a built-in AI agent – You can use a new serverless notebook with a built-in AI agent, which supports SQL, Python, Spark, or natural language and gives data engineers, analysts, and data scientists one place to develop and run both SQL queries and code.

You also have access to other tools such as a Query Editor for SQL analysis, JupyterLab integrated developer environment (IDE), Visual ETL and workflows, and machine learning (ML) capabilities.

Try one-click onboarding and connect to Amazon SageMaker Unified Studio
To get started, go to the SageMaker console and choose the Get started button.

You will be prompted either to select an existing AWS Identity and Access Management (AWS IAM) role that has access to your data and compute, or to create a new role.

Choose Set up. It takes a few minutes to complete your environment. After this role is granted access, you’ll be taken to the SageMaker Unified Studio landing page where you will see the datasets that you have access to in AWS Glue Data Catalog as well as a variety of analytics and AI tools to work with.

This environment automatically creates the following serverless compute: Amazon Athena Spark, Amazon Athena SQL, AWS Glue Spark, and Amazon Managed Workflows for Apache Airflow (MWAA) serverless. This means you completely skip provisioning and can start working immediately with just-in-time compute resources, and it automatically scales back down when you finish, helping to save on costs.

You can also get started working on specific tables in Amazon Athena, Amazon Redshift, and Amazon S3 Tables. For example, you can select Query your data in Amazon SageMaker Unified Studio and then choose Get started in Amazon Athena console.

If you start from these consoles, you’ll connect directly to the Query Editor with the data that you were looking at already accessible, and your previous query context preserved. By using this context-aware routing, you can run queries immediately once inside the SageMaker Unified Studio without unnecessary navigation.

Getting started with notebooks with a built-in AI agent
Amazon SageMaker is introducing a new notebook experience that provides data and AI teams with a high-performance, serverless programming environment for analytics and ML jobs. The new notebook experience includes Amazon SageMaker Data Agent, a built-in AI agent that accelerates development by generating code and SQL statements from natural language prompts while guiding users through their tasks.

To start a new notebook, choose the Notebooks menu in the left navigation pane to run SQL queries, Python code, and natural language, and to discover, transform, analyze, visualize, and share insights on data. You can get started with sample data such as customer analytics and retail sales forecasting.

When you choose a sample project for customer usage analysis, you can open sample notebook to explore customer usage patterns and behaviors in a telecom dataset.

As I noted, the notebook includes a built-in AI agent that helps you interact with your data through natural language prompts. For example, you can start with data discovery using prompts like:

Show me some insights and visualizations on the customer churn dataset.

After you identify relevant tables, you can request specific analysis to generate Spark SQL. The AI agent creates step-by-step plans with initial code for data transformations and Python code for visualizations. If you see an error message while running the generated code, choose Fix with AI to get help resolving it. Here is a sample result:

For ML workflows, use specific prompts like:

Build an XGBoost classification model for churn prediction using the churn table, with purchase frequency, average transaction value, and days since last purchase as features.

This prompt receives structured responses including a step-by-step plan, data loading, feature engineering, and model training code using the SageMaker AI capabilities, and evaluation metrics. SageMaker Data Agent works best with specific prompts and is optimized for AWS data processing services including Athena for Apache Spark and SageMaker AI.

To learn more about new notebook experience, visit the Amazon SageMaker Unified Studio User Guide.

Now available
One-click onboarding and the new notebook experience in Amazon SageMaker Unified Studio are now available in US East (Ohio), US East (N. Virginia), US West (Oregon), Asia Pacific (Mumbai), Asia Pacific (Singapore), and Asia Pacific (Sydney), Asia Pacific (Tokyo), Europe (Frankfurt), Europe (Ireland) Regions. To learn more, visit the SageMaker Unified Studio product page.

Give it a try in the SageMaker console and send feedback to AWS re:Post for SageMaker Unified Studio or through your usual AWS Support contacts.

Channy

Build production-ready applications without infrastructure complexity using Amazon ECS Express Mode

This post was originally published on this site

Deploying containerized applications to production requires navigating hundreds of configuration parameters across load balancers, auto scaling policies, networking, and security groups. This overhead delays time to market and diverts focus from core application development.

Today, I’m excited to announce Amazon ECS Express Mode, a new capability from Amazon Elastic Container Service (Amazon ECS) that helps you launch highly available, scalable containerized applications with a single command. ECS Express Mode automates infrastructure setup including domains, networking, load balancing, and auto scaling through simplified APIs. This means you can focus on building applications while deploying with confidence using Amazon Web Services (AWS) best practices. Furthermore, when your applications evolve and require advanced features, you can seamlessly configure and access the full capabilities of the resources, including Amazon ECS.

You can get started with Amazon ECS Express Mode by navigating to the Amazon ECS console.

Amazon ECS Express Mode provides a simplified interface to the Amazon ECS service resource with new integrations for creating commonly used resources across AWS. ECS Express Mode automatically provisions and configures ECS clusters, task definitions, Application Load Balancers, auto scaling policies, and Amazon Route 53 domains from a single entry point.

Getting started with ECS Express Mode
Let me walk you through how to use Amazon ECS Express Mode. I’ll focus on the console experience, which provides the quickest way to deploy your containerized application.

For this example, I’m using a simple container image application running on Python with the Flask framework. Here’s the Dockerfile of my demo, which I have pushed to an Amazon Elastic Container Registry (Amazon ECR) repository:


# Build stage
FROM python:3.6-slim as builder
WORKDIR /app
COPY requirements.txt .
RUN pip install --no-cache-dir --user -r requirements.txt gunicorn

# Runtime stage
FROM python:3.6-slim
WORKDIR /app
COPY --from=builder /root/.local /root/.local
COPY app.py .
ENV PATH=/root/.local/bin:$PATH
EXPOSE 80
CMD ["gunicorn", "--bind", "0.0.0.0:80", "app:app"]

On the Express Mode page, I choose Create. The interface is streamlined — I specify my container image URI from Amazon ECR, then select my task execution role and infrastructure role. If you don’t already have these roles, choose Create new role in the drop down to have one created for you from the AWS Identity and Access Management (IAM) managed policy.

If I want to customize the deployment, I can expand the Additional configurations section to define my cluster, container port, health check path, or environment variables.

In this section, I can also adjust CPU, memory, or scaling policies.

Setting up logs in Amazon CloudWatch Logs is something I always configure so I can troubleshoot my applications if needed. When I’m happy with the configurations, I choose Create.

After I choose Create, Express Mode automatically provisions a complete application stack, including an Amazon ECS service with AWS Fargate tasks, Application Load Balancer with health checks, auto scaling policies based on CPU utilization, security groups and networking configuration, and a custom domain with an AWS provided URL. I can also follow the progress in Timeline view on the Resources tab.

If I need to do a programmatic deployment, the same result can be achieved with a single AWS Command Line Interface (AWS CLI) command:

aws ecs create-express-gateway-service 
--image [ACCOUNT_ID].ecr.us-west-2.amazonaws.com/myapp:latest 
--execution-role-arn arn:aws:iam::[ACCOUNT_ID]:role/[IAM_ROLE] 
--infrastructure-role-arn arn:aws:iam::[ACCOUNT_ID]:role/[IAM_ROLE]

After it’s complete, I can see my application URL in the console and access my running application immediately.

After the application is created, I can see the details by visiting the specified cluster, or the default cluster if I didn’t specify one, in the ECS service to monitor performance, view logs, and manage the deployment.

When I need to update my application with a new container version, I can return to the console, select my Express service, and choose Update. I can use the interface to specify a new image URI or adjust resource allocations.

Alternatively, I can use the AWS CLI for updates:

aws ecs update-express-gateway-service 
  --service-arn arn:aws:ecs:us-west-2:[ACCOUNT_ID]:service/[CLUSTER_NAME]/[APP_NAME] 
  --primary-container '{
    "image": "[IMAGE_URI]"
  }'

I find the entire experience reduces setup complexity while still giving me access to all the underlying resources when I need more advanced configurations.

Additional things to know
Here are additional things about ECS Express Mode:

  • Availability – ECS Express Mode is available in all AWS Regions at launch.
  • Infrastructure as Code support – You can use IaC tools such as AWS CloudFormation, AWS Cloud Development Kit (CDK), or Terraform to deploy your applications using Amazon ECS Express Mode.
  • Pricing – There is no additional charge to use Amazon ECS Express Mode. You pay for AWS resources created to launch and run your application.
  • Application Load Balancer sharing – The ALB created is automatically shared across up to 25 ECS services using host-header based listener rules. This helps distribute the cost of the ALB significantly.

Get started with Amazon ECS Express Mode through the Amazon ECS console. Learn more on the Amazon ECS documentation page.

Happy building!
Donnie

Use of CSS stuffing as an obfuscation technique?, (Fri, Nov 21st)

This post was originally published on this site

From time to time, it can be instructive to look at generic phishing messages that are delivered to one’s inbox or that are caught by basic spam filters. Although one usually doesn’t find much of interest, sometimes these little excursions into what should be a run-of-the-mill collection of basic, commonly used phishing techniques can lead one to find something new and unusual. This was the case with one of the messages delivered to our handler inbox yesterday…

Introducing attribute-based access control for Amazon S3 general purpose buckets

This post was originally published on this site

As organizations scale, managing access permissions for storage resources becomes increasingly complex and time-consuming. As new team members join, existing staff changes roles, and new S3 buckets are created, organizations must constantly update multiple types of access policies to govern access across their S3 buckets. This challenge is especially pronounced in multi-tenant S3 environments where administrators must frequently update these policies to control access across shared datasets and numerous users.

Today we’re introducing attribute-based access control (ABAC) for Amazon Simple Storage Service (S3) general purpose buckets, a new capability you can use to automatically manage permissions for users and roles by controlling data access through tags on S3 general purpose buckets. Instead of managing permissions individually, you can use tag-based IAM or bucket policies to automatically grant or deny access based on tags between users, roles, and S3 general purpose buckets. Tag-based authorization makes it easy to grant S3 access based on project, team, cost center, data classification, or other bucket attributes instead of bucket names, dramatically simplifying permissions management for large organizations.

How ABAC works
Here’s a common scenario: as an administrator, I want to give developers access to all S3 buckets meant to be used in development environments.

With ABAC, I can tag my development environment S3 buckets with a key-value pair such as environment:development and then attach an ABAC policy to an AWS Identity and Access Management (IAM) principal that checks for the same environment:development tag. If the bucket tag matches the condition in the policy, the principal is granted access.

Let’s see how this works.

Getting started
First, I need to explicitly enable ABAC on each S3 general purpose bucket where I want to use tag-based authorization.

I navigate to the Amazon S3 console, select my general purpose bucket then navigate to Properties where I can find the option to enable ABAC for this bucket.

I can also use the AWS Command Line Interface (AWS CLI) to enable it programmatically by using the new PutBucketAbac API. Here I am enabling ABAC on a bucket called my-demo-development-bucket located in the US East (Ohio) us-east-2 AWS Region.

aws s3api put-bucket-abac --bucket my-demo-development-bucket abac-status Status=Enabled --region us-east-2

Alternatively, if you use AWS CloudFormation, you can enable ABAC by setting the AbacStatus property to Enabled in your template.

Next, let’s tag our S3 general purpose bucket. I add an environment:development tag which will become the criteria for my tag-based authorization.

Now that my S3 bucket is tagged, I’ll create an ABAC policy that verifies matching environment:development tags and attach it to an IAM role called dev-env-role. By managing developer access to this role, I can control permissions to all development environment buckets in a single place.

I navigate to the IAM console, choose Policies, and then Create policy. In the Policy editor, I switch to JSON view and create a policy that allows users to read, write and list S3 objects, but only when they have a tag with a key of “environment” attached and its value matches the one declared on the S3 bucket. I give this policy the name of s3-abac-policy and save it.

{
    "Version": "2012-10-17",
    "Statement": [
        {
            "Effect": "Allow",
            "Action": [
                "s3:GetObject",
                "s3:PutObject",
                "s3:ListBucket"
            ],
            "Resource": [
                "*"
            ],
            "Condition": {
                "StringEquals": {
                    "aws:ResourceTag/environment": "development"
                }
            }
        }
    ]
}

I then attach this s3-abac-policy to the dev-env-role.

That’s it! Now a user assuming the dev-role can access any ABAC-enabled bucket with the tag environment:development such as my-demo-development-bucket.

Using your existing tags
Keep in mind that although you can use your existing tags for ABAC, because these tags will now be used for access control, we recommend reviewing your current tag setup before enabling the feature. This includes reviewing your existing bucket tags and tag-based policies to prevent unintended access, and updating your tagging workflows to use the standard TagResource API (since enabling ABAC on your buckets will block the use of the PutBucketTagging API). You can use AWS Config to check which buckets have ABAC enabled and review your usage of PutBucketTagging API in your application using AWS Cloudtrail management events.

Additionally, the same tags you use for ABAC can also serve as cost allocation tags for your S3 buckets. Activate them as cost allocation tags in the AWS Billing Console or through APIs, and your AWS Cost Explorer and Cost and Usage Reports will automatically organize spending data based on these tags.

Enforcing tags on creation
To help standardize access control across your organization, you can now enforce tagging requirements when buckets are created through service control policies (SCPs) or IAM policies using the aws:TagKeys and aws:RequestTag condition keys. Then you can enable ABAC on these buckets to provide consistent access control patterns across your organization. To tag a bucket during creation you can add the tags to your CloudFormation templates or provide them in the request body of your call to the existing S3 CreateBucket API. For example, I could enforce a policy for my developers to create buckets with the tag environment=development so all my buckets are tagged accurately for cost allocation. If I want to use the same tags for access control, I can then enable ABAC for these buckets.

Things to know

With ABAC for Amazon S3, you can now implement scalable, tag-based access control across your S3 buckets. This feature makes writing access control policies simpler, and reduces the need for policy updates as principals and resources come and go. This helps you reduce administrative overhead while maintaining strong security governance as you scale.

Attribute-based access control for Amazon S3 general purpose buckets is available now through the AWS Management Console, API, AWS SDKs, AWS CLI, and AWS CloudFormation at no additional cost. Standard API request rates apply according to Amazon S3 pricing. There’s no additional charge for tag storage on S3 resources.

You can use AWS CloudTrail to audit access requests and understand which policies granted or denied access to your resources.

You can also use ABAC with other S3 resources such as S3 directory bucket, S3 access points and S3 tables buckets and tables. To learn more about ABAC on S3 buckets see the Amazon S3 User Guide.

You can use the same tags you use for access control for cost allocation as well. You can activate them as cost allocation tags through the AWS Billing Console or APIs. Check out the documentation for more details on how to use cost allocation tags.